Loopy Pro: Create music, your way.
What is Loopy Pro? — Loopy Pro is a powerful, flexible, and intuitive live looper, sampler, clip launcher and DAW for iPhone and iPad. At its core, it allows you to record and layer sounds in real-time to create complex musical arrangements. But it doesn’t stop there—Loopy Pro offers advanced tools to customize your workflow, build dynamic performance setups, and create a seamless connection between instruments, effects, and external gear.
Use it for live looping, sequencing, arranging, mixing, and much more. Whether you're a live performer, a producer, or just experimenting with sound, Loopy Pro helps you take control of your creative process.
Download on the App StoreLoopy Pro is your all-in-one musical toolkit. Try it for free today.
OT The build your own Midi controller topic
![[Deleted User]](https://secure.gravatar.com/avatar/1e8e0fa2dfeb8cb120991c45c3e712ef/?default=https%3A%2F%2Fvanillicon.com%2Fe549b0eefb9d8c47309ffd57dd681091_200.png&rating=g&size=200)
Hi Bussers,
Yesterday talking with @jakoB_haQ at their yt comments about his DubMonsta vid we wonder the idea to share thoughts on this field. I'm not a professional for electronics or coding but I have digged a bit in the field the last 8 years so almost I will try to contribute.
First the video as background
Since he find the usual troubles with diy electronics of anyone without the proper knowledge will find... this topic could be a mix between "howtos" (instructables) and "strategy" (since most of us are musicians first and geeks later) and I want to start from zero knowledge pov to help the most users possible. With thst spirit any knowledge, contribution and correction will be welcome but let's try to keep things the most simple and straightforward, so here we go!
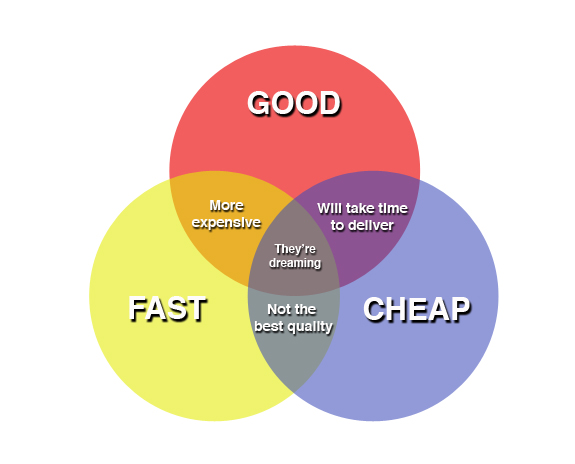
If it already exists try to buy it instead of building it.
The Lazy but Successful anonymous musicianIf it gets broken (and you can't afford repairing service) then it's a good moment to start "fixing".
The not-so Lazy but Poor man.If it's not broken, don't fix it motherfocker!
Your manager.
DIY is a highly time consuming process and sometimes we think something is expensive or doable in my free time... but it isn't.
Don't lie yourself, please...
As every year goes it's more easy and affordable but it's still hard to build something from scratch if you don't have the proper knowledge and tools.
Keep that in your mind and any engineer will be hurt in the process
![]() :
:
Where to start?
First of all start small. Jakob could explain you why go for the BIG could be a nightmare from money pov and from debbuging too. Let's try to put this as "flow chart"...
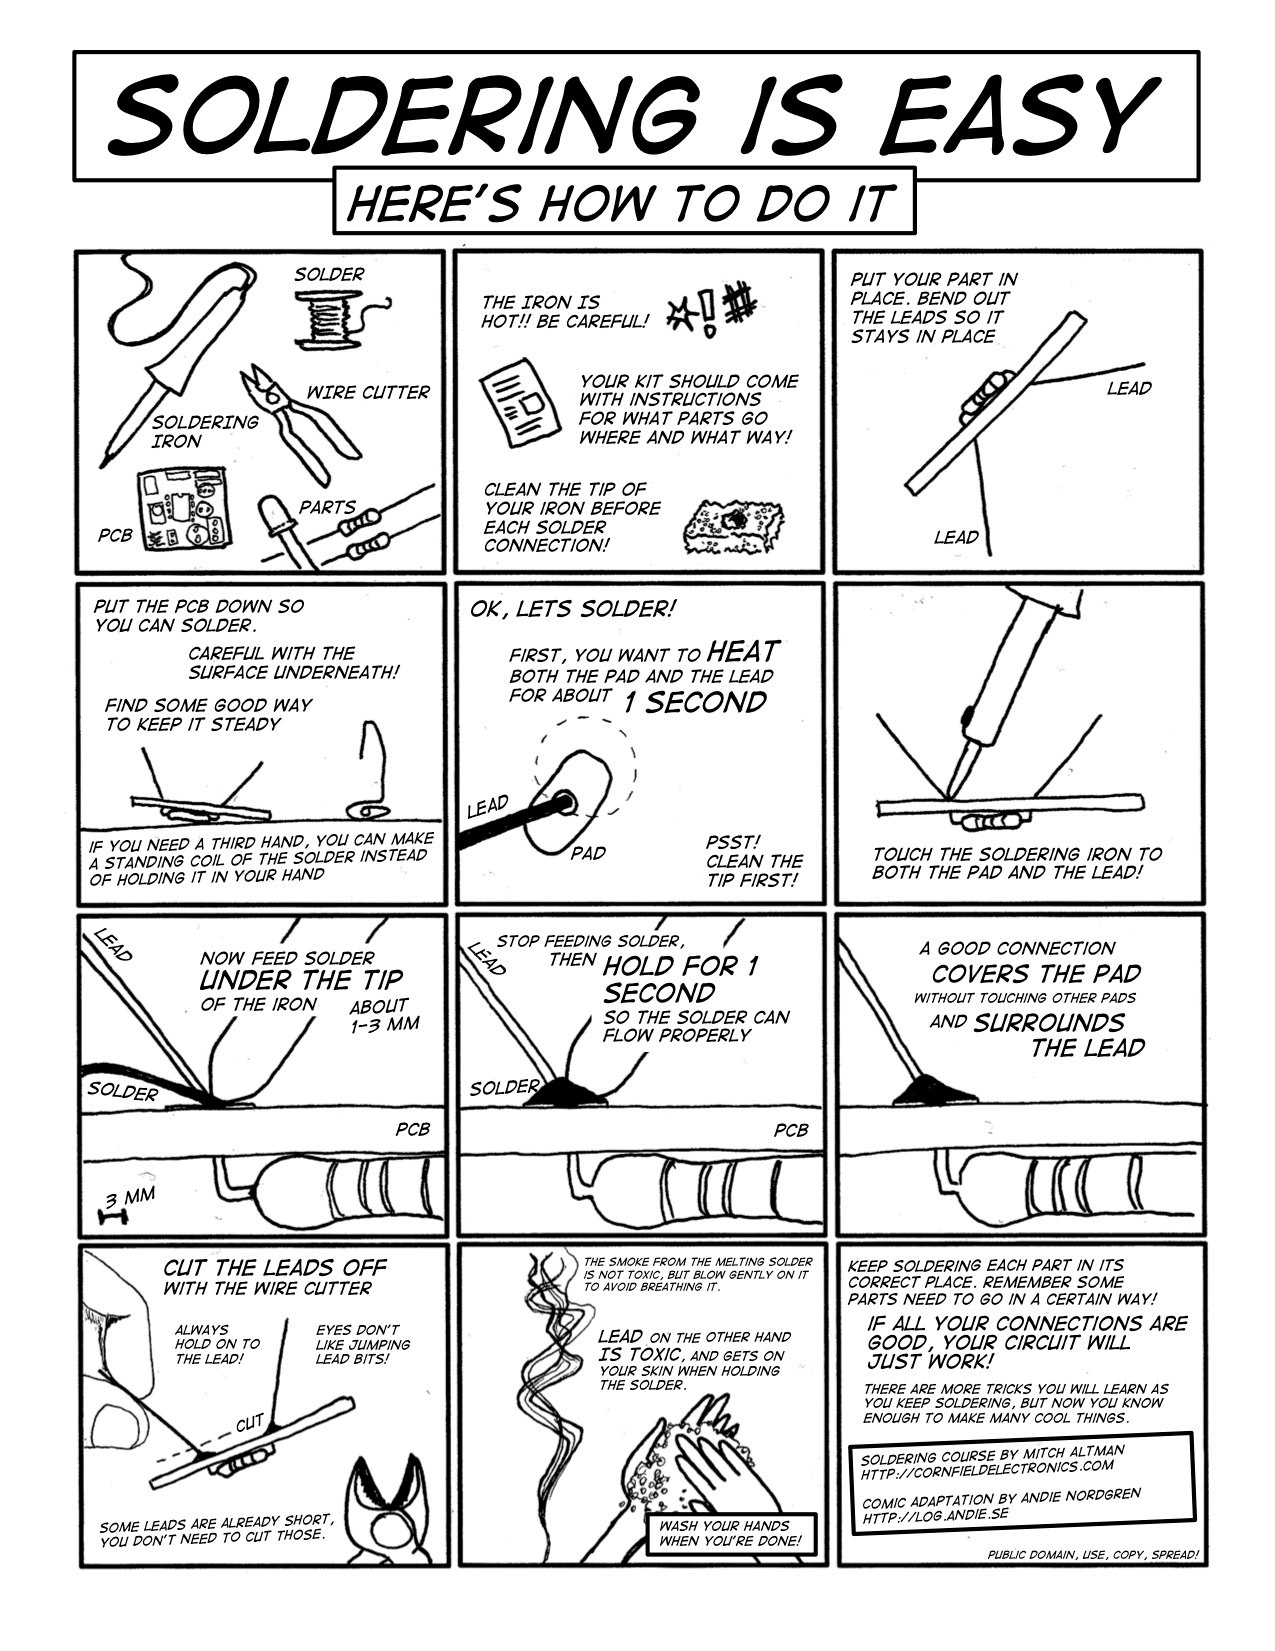
The easiest part is iron soldering. Anyone with a proper soldering tools (not so expensive) could learn.
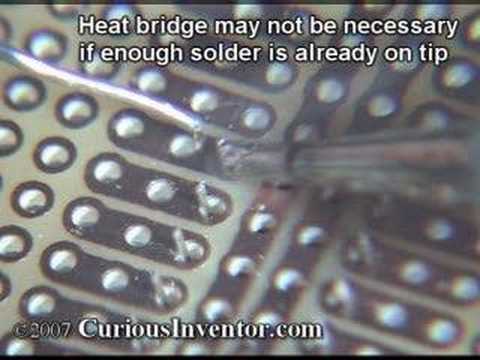
As reference video material this one from CuriousInventor could be helpful.
The minimum theory you need aside how to solder is related to analog vs digital inputs. I recommend the Arduino Reference page as introduction but obviously the most knowledge you can build the better. Also adafruit has very good wiki for stsrters.
https://www.arduino.cc/en/Tutorial/AnalogInput
https://learn.adafruit.com/adafruit-arduino-lesson-6-digital-inputs/arduino-code
We can resume (too much maybe) that analog INPUT signals are usually the pots and knobs (these ones with range and CC attached to them) meanwhile digital INPUT are usually buttons and encoders.
Output signal are another history (from leds to motor drives...)
Take a breath (and notes). It makes sense? Breath again...
Oukeey... With the basic knowledge you can go in the next step so...
Coding or hacking?
Hardware hacking could be easy than code a hardware platform (like Arduino) but also you can go middle route with fast-food midi kits. So:
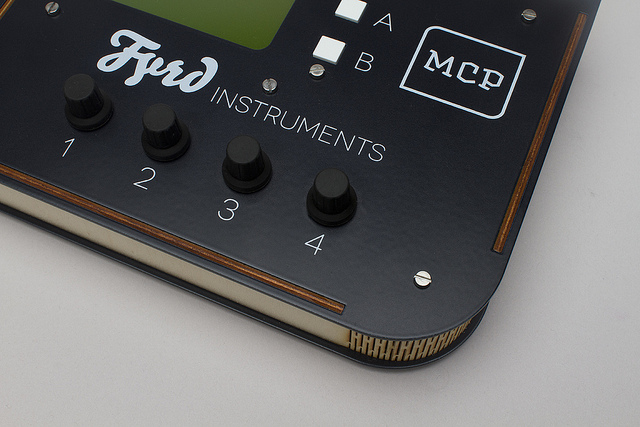
if there is out there an already hardware product which has the necessary knobs, pots, buttons, etc... which you need for your work BUT not the desirable quality build (korg Nanos I'm looking to you!) then you can avoid coding and hard debbuging electronics just soldering new components where the old where placed.

http://zeal.co/archaeopteryx-a-diy-midi-controller/
I can't know what do you have in mind (sometimes even yourself will be dreaming a no-way without know it ![]() ) so I will go first the fast-food midi kits and later the full open platform for the brave ones!
) so I will go first the fast-food midi kits and later the full open platform for the brave ones! ![]()
Midi ready kits.
You can find in the internet some of these from the classic doepfer to the opendeck platform. If you ask me for an option I will point once again for the "most tested" and/or "most supported" but sometimes the answer will not fit your needs so... research will give you the solution (start the chrono, baby...)
Examples:
http://www.doepfer.de/pe.htm
The entry level pocket electronics
http://www.doepfer.de/ctm.htm
The classic keyboard retrofit kit for old keyboards without midi...
http://www.doepfer.de/usb64.htm
The usb beast. Wonderful but expensive.
You can check the full catalog includding some midi to cv and other bizarre options.
http://www.doepfer.de/home_e.htm
Opendeck:
https://shanteacontrols.wordpress.com/2017/01/30/opendeck-platform-v1-0/
Very complete, web based setup, lots of input/output signals... and not so expensive (cheaper than the doepfer usb)
Ucapps.de
http://www.ucapps.de/
Very powerfull, very complete, very expensive, very complex. Never the introductory choice (sorry Jakob).
You can find more midi kits but with these three you can cover more than you will need for your entire live (IMHO)
Next step: Coding Enclousures
At this point you should have a concept springy inside your brain waiting for scape... fablab!
If you have seen entirely the Jakob video when he explain how he made these wonderful enclousure you will notice he didn't ![]() . That was a good movement and the application of the first rule:
. That was a good movement and the application of the first rule:
Buy before craft, craft only if you can't afford...
but if you still want to make by yourself then visit a fablab/hackerspace in your area. It will help you a lot (if you came with a clear idea and some homework done, of course)
Obviously if you have a dremel and collect some nice cigarrette box or similar you can try it. Sometimes this could be the fastest approach and the results could be better than you wonder (or worse than you want ![]() ) and there is something special in hand tooling working from zen pov.
) and there is something special in hand tooling working from zen pov. ![]()


If you want to go the 3D printing path I recommend you go from 2D approach to 3D. It means:
- Draw your frontpanel
- Find the way to vectorize it (by yourself, by a friend or by fablab service)
- Bring it to the fablab to let them help you to improve it (building the box from slices or "lego-like")
- Avoid plastic the most you can. It's still fragile than wood and more toxic.
- If you want plastic anyway then go for thermoformed machines instead 3D printer. 3D printers are for prototyping atm and you want a controller to be abused. Remember it.
- Cnc routing only for metal faceplates. Wood enclousures could be nice too but it's cheaper and faster do the wood box by slices and glue them. It's easy to do modifications and don't require true 3D model but in addition it could be finished product prototype.

Lego box
Metal faceplate and special wood box with bend cut technique

Slice technique instead cnc milling. You got the idea, right?
Coding.
Ok, I tried to avoid this chapter the most as I can but here we are. ![]()
Let's do it faster...
Take some arduino classes to check if you like to code.
If you like it, go for C++ or Python, if not try Scrath4arduino. If neither then try maxforlive and if you like it... then buy a controller and forgot about diy hardware, you will not have time to do all properly... just kidding (¿?) but anyway check this:
http://www.otemrellik.com/
His blog is a great source for inspiration but also you can notice the some many skills do you need to make something similar (C++ for teensy, pd for mobmuplat, electronic knowledge, 3D design...)
So just dig a bit until find your own way. Also you can check this other forum where you can find an Arduino midi project with lots of info...
http://forum.djtechtools.com/showthread.php?t=21705
I get mad about all of this so I keep myself simple with hardware hacking and software mangling... but hey! Maybe you are the next otem rellik so don't take me so serious and if you love code go for it! ![]()
Let me said thanks in advance since I expect lots of comments ![]() but if not, almost I put my "brief mind about this field" and I can forget about it or come back to share all my new monstas and keeping it rollin
but if not, almost I put my "brief mind about this field" and I can forget about it or come back to share all my new monstas and keeping it rollin ![]()
That's all folks!

Comments
The need for this course and the fact he guarantee life access makes a point about how difficult could it be mess with this stuff ATM (even I'm sure technology will evolve into easy day by day).
Thanks a lot for the resource @5pinlink I'm sure lots of people could get benefeit from link like this
@Dubbylabby, have you built some diy midi controllers?
I agree heartily, about DIY not being a good route to clone something you can buy at a store. After the initial coolness wears off, you will resent the time spent on it, and its eccentricities, and ways it fails to emulate the thing you were trying to clone. However, truly unique DIY projects, that get completed and work well, are generally a source of pride and are impressive to others, especially other musicians. Time passes whether you're busy with something or not. Building things takes a lot of time, but so does playing a video game, or watching 5 seasons of CSI.
I liked how honest @jakoB_haQ was, about stuff that didn't work right, and how much time it took, and the high cost of materials. He has good advice about beginners avoiding elaborate, overly ambitious projects early on. Even if you are tenacious, and can get it done eventually, you are most likely emotionally unprepared for the amount of time and effort involved, and when progress is much slower than you imagined, it wears on your enthusiasm, and confidence in your skill.
Amazing post!
Yeah I build some things in workshops (arduinome) or with friends collab back in the day (numark cdx and tascam ttm midi modding) and some hacking lately since I avoid code (or patch) programming the most as I can
I started building Arduinomes and shields for different purposes and also hacking korg stuff (nanos, monotrons, volcas, etc) and my last project was an old idea that I need to make happen: keytar.
Highlights
Next?
Thanks, mate!
Boomerang!
http://cdm.link/2017/06/a-tiny-ios-audiomidi-interface-a-huge-diy-ios-midi-controller/
And also interesting...
http://cdm.link/2017/06/tinamis-midi-controllers-look-like-moogerfoogers-built-order/
Great post @Dubbylabby
Awesome amount of info!
Also, id like to add that I hot into DIY electronics because I couldn't buy the stuff I wanted. It didn't exist. So I had to learn how to build it.
Like @Processaurus said and I quote:
This was true for me. But I also had my ego saving me from quoting completely. I had to have my Dubmasta. I just had to have it. So in the end I also decided to compromise. Only finishing up the parts I needed for performing. And what was either non-functioning or even broken, had to wait. And it's still waiting.
I hihgly recommend getting into DIY. But starting with a project like the Dubmasta is a bad Idea.
Oh and Ive been looking into the doepfee stuff. And I might actually go for something like that.")
Oh and i also build other stuff after building the Dubmasta.
Like the I Dobble Delay!
And the Springa spring tank reverb
@jakoB_haQ thanks to join and share. I'm very happy all this experience could help others so if you need more help with Doepfers or any other point, drop the question and I will try to bring answers
Amazing!
Schematics or details on that?
I also messed with monotrons and have an unfinnished project with the Delay...
Also I found for the braves a good collection of tutorials for midi and arduino...
Source and more info:
http://www.notesandvolts.com/2016/04/arduino-midi-controller-buttons.html
https://www.patreon.com/notesandvolts
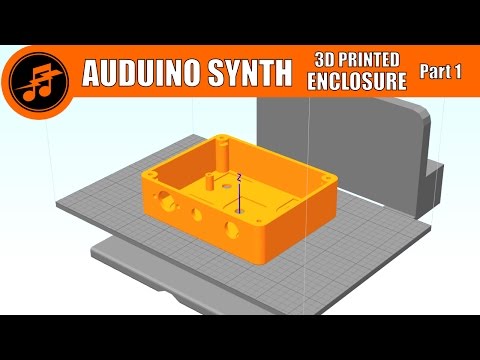
Extra: 3D print enclosure
Cool! i have one of these spring reverbs from old mixer in the basement to mess with it! Give more info, mate!
Nice work guys, I built multiple controllers myself, some as a kit, some from scratch, some hacked and any possible combination of these. I'm surprised you guys don't mention H.I.D. devices (keyboards, dance-mats, mouses, joysticks, etc. etc) in combination with software like Junxion (on mac) or Bomes (on windows). This is a very interesting combination and in my experience the onboard HID-protocol of your system has less latency then any midi-controller i know. Also you can attach buttons, pots and knobs at your own taste to the pcb of any joystick as long as it has usb and stuff it into any housing, from a solid block of wood to chess-boxes to teddybears. Anyway, for me it started with a 4x4 sanwa-button grid that has a teensy-board as brain, coding was new to me but i got it to do what i wanted it to do eventually... it took me 3 days. My flagship controller created for use with ableton live was created in 2 months, it consists of 4 Nanokontrols and a simple qwerty-keyboard. Hope you like it...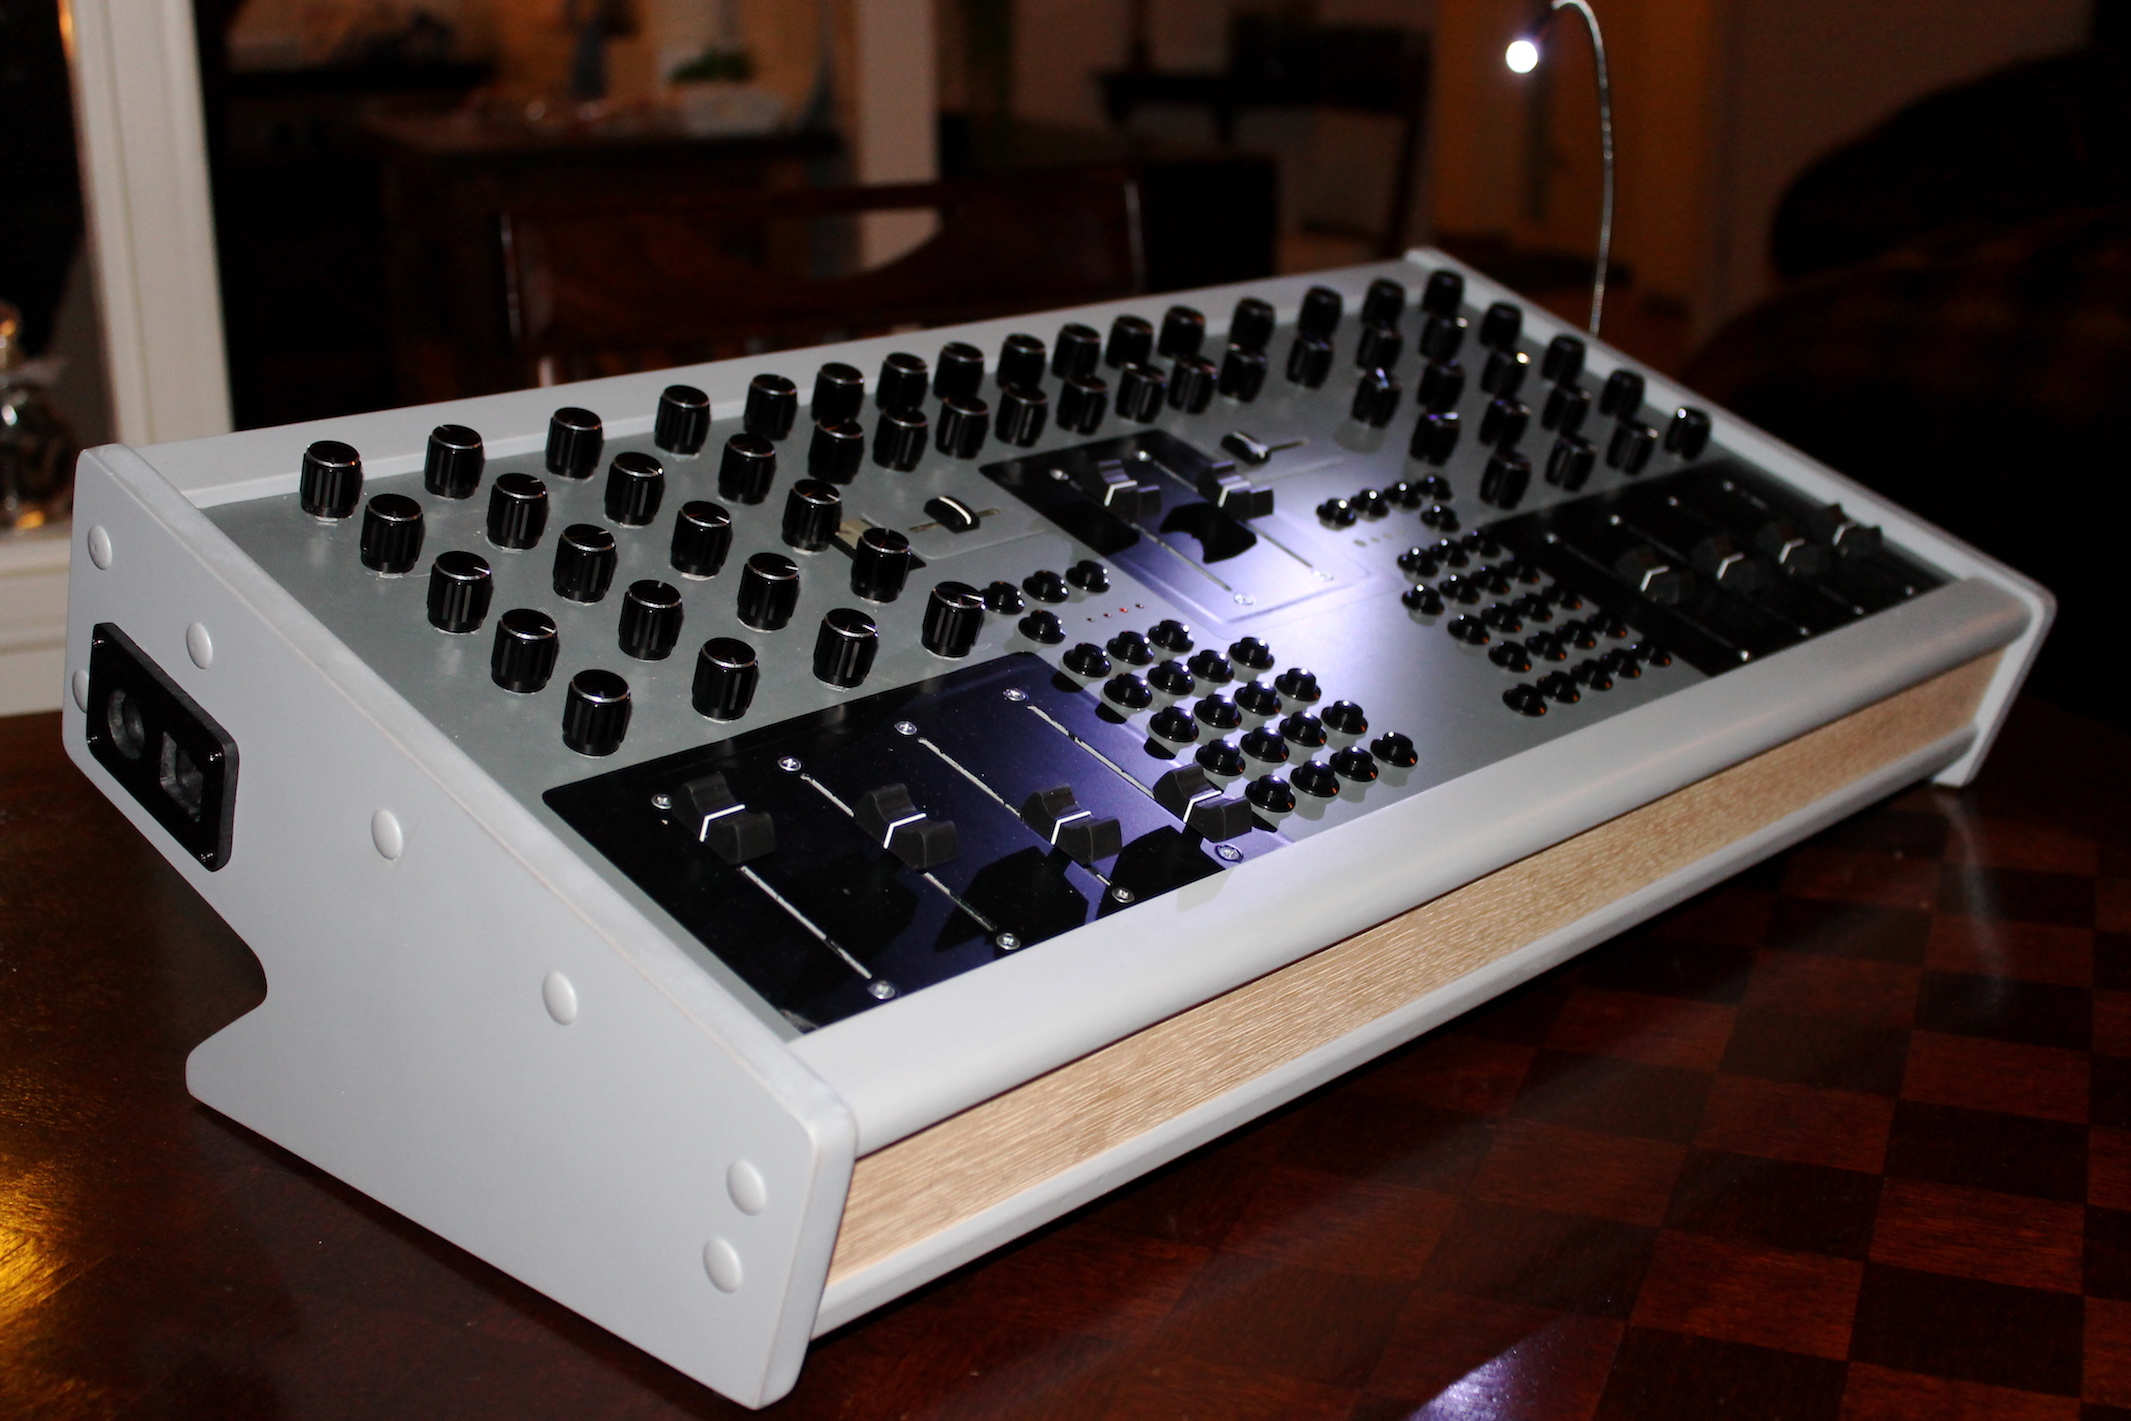
Nice work!
About HID... it doesn't work on iOS (instead you hardcore the driver into your own app like traktor and z1) so that's why I directly bypassed it. One of my first attempts was with Leobodnar board and under desktop OSes I recommend hack joysticks with analog stick (those like PlayStation) and hub them with junxion... or similar on Windows like you pointed
What maybe could be interesting and you remember me is bomebox. It has USB host, midi din, Ethernet and wifi... also loads bome scripts
https://www.bome.com/products/bomebox
Buuut... since the cck3 emerged and let iOS users charge aside USB hosting the most similar app with bizarre midi filtering and so is Midiflow.
Thanks for share your projects and vision, mate. If you want to go deeper on that (HID) just do it due knowledge is useful everytime

Also some helpful info on teensying will be welcomed from those who want to code
Hubba hubba. Do you have a write up anywhere on this or specifically reappropriating the nanokontrols?
It's an extra $60 but Bomebox can also house MIDI Translator Pro files for deeper config setups. Wish they had a free version that could only be run from the box but still, pretty cool.
Yup I forgot it requires a license too!
@syrupcore thanks for pointining it. It's what I called "scripts" (midi strokes, functions and all these lovely pseudo-coding :yay:) and other goodies (they were working on midiHd and Ableton link too). It's a great hardware
About nanorecycling I linked one tuto under the pic at my first post...
http://zeal.co/archaeopteryx-a-diy-midi-controller/
Short video testing the keytar. Next step embedding an old iPhone4 on it...
My Midi Controller--Project for the next year.
Awesome! I love Roli gear... please share your upgrades @freemobil64
How are you going to do the LCD displays?
Oh man! How did I miss this thread. Great stuff being discussed here.
I hope similar to the Novation Midi Controller Display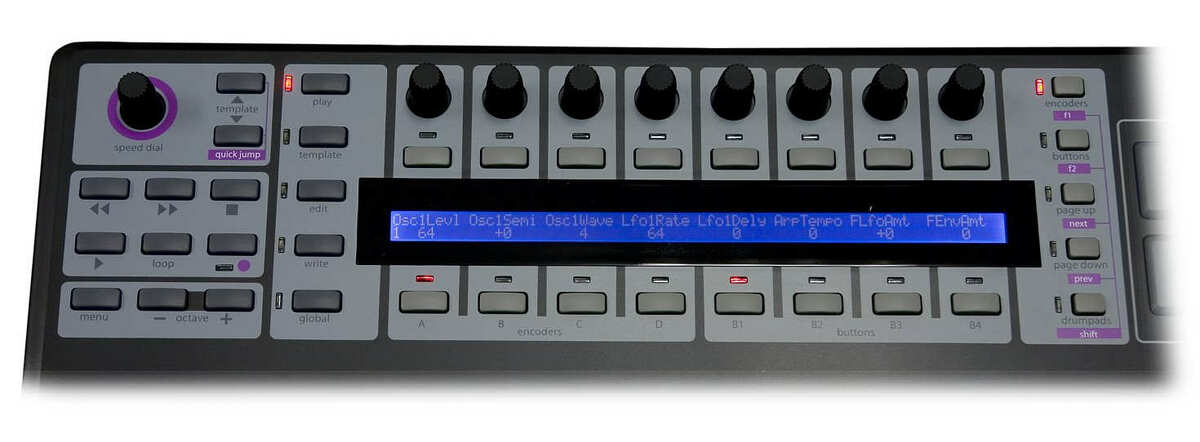
Did you have decided which platform will be used? Did you read my first post? Do you have knowledge about coding? Just to be sure you are not going to make the same mistakes I tried to help to avoid with the post itself...
Thx for your information Dubbylabby. I knowing this. I am more the Konzept-Designer. A friend from me are radio-tv technical, and for 2 years he build his own hardware analog Synthesizer, with Sequencer. And he is programming and working with Adroino.
Ok so if he’s doing to use arduino I can point you to some resources for lcds")
https://www.arduino.cc/en/Tutorial/HelloWorld
https://learn.adafruit.com/adafruit-arduino-lesson-11-lcd-displays-1/arduino-code
https://www.zonamaker.com/arduino/modulos-sensores-y-shields/tipos-de-lcd-para-arduino
Also remember check the arduino tread from djtt I linked in my first topic which has a lot of work done about encoders and (I hope) motorized faders.
http://forum.djtechtools.com/showthread.php?t=21705
Thanks, for your links. Many intressing stuff about Adruino and other things.
Wow, some impressive creations here! I wrote to the Bomebox dev about a year ago about extending the features of the Bomebox. They seem very receptive to suggestions, so send a message if you like. I use their Bome Network, it's rock solid, and MTP, whichl they are considering porting to iOS. I'd love to see them add AOIP to the box.
I talked to them and I was invited to first batch betatesting due my interest... but they took so long the whole process so cck3 with iPad charging arrived and make bomebox irrelevant for my setup (usb hub+cck3+midiflow covered my needs). I also advice them to implement OSC and ALink. It’s a great unit for those who need standalone and Bome scripts out of scope from midiflow.
You are welcome, mate. Keep us updated about your project!
I'd just like to build something resembing a simplifed DJ controller. Crossfader, some knobs for CC control, a few horizontal sliders and a couple of mk2 mini style joysticks and buttons.
I'd probably just use arcade buttons and sticks because they're easy hookup. Or even USB hookups to NES controllers or whatever
If it helps, I already have a wej for the brains. Also a couple raspis and raspi zeros
Basically, I just need something to design for TouchViz.
Is there any existing input -> midi -> wired out solutions out there?