Loopy Pro: Create music, your way.
What is Loopy Pro? — Loopy Pro is a powerful, flexible, and intuitive live looper, sampler, clip launcher and DAW for iPhone and iPad. At its core, it allows you to record and layer sounds in real-time to create complex musical arrangements. But it doesn’t stop there—Loopy Pro offers advanced tools to customize your workflow, build dynamic performance setups, and create a seamless connection between instruments, effects, and external gear.
Use it for live looping, sequencing, arranging, mixing, and much more. Whether you're a live performer, a producer, or just experimenting with sound, Loopy Pro helps you take control of your creative process.
Download on the App StoreLoopy Pro is your all-in-one musical toolkit. Try it for free today.
Question: Can a play group in this template only play the clips that are active

@espiegel123, I have a project based on one of your template projects and I'm wondering if you can offer your thoughts on the following:
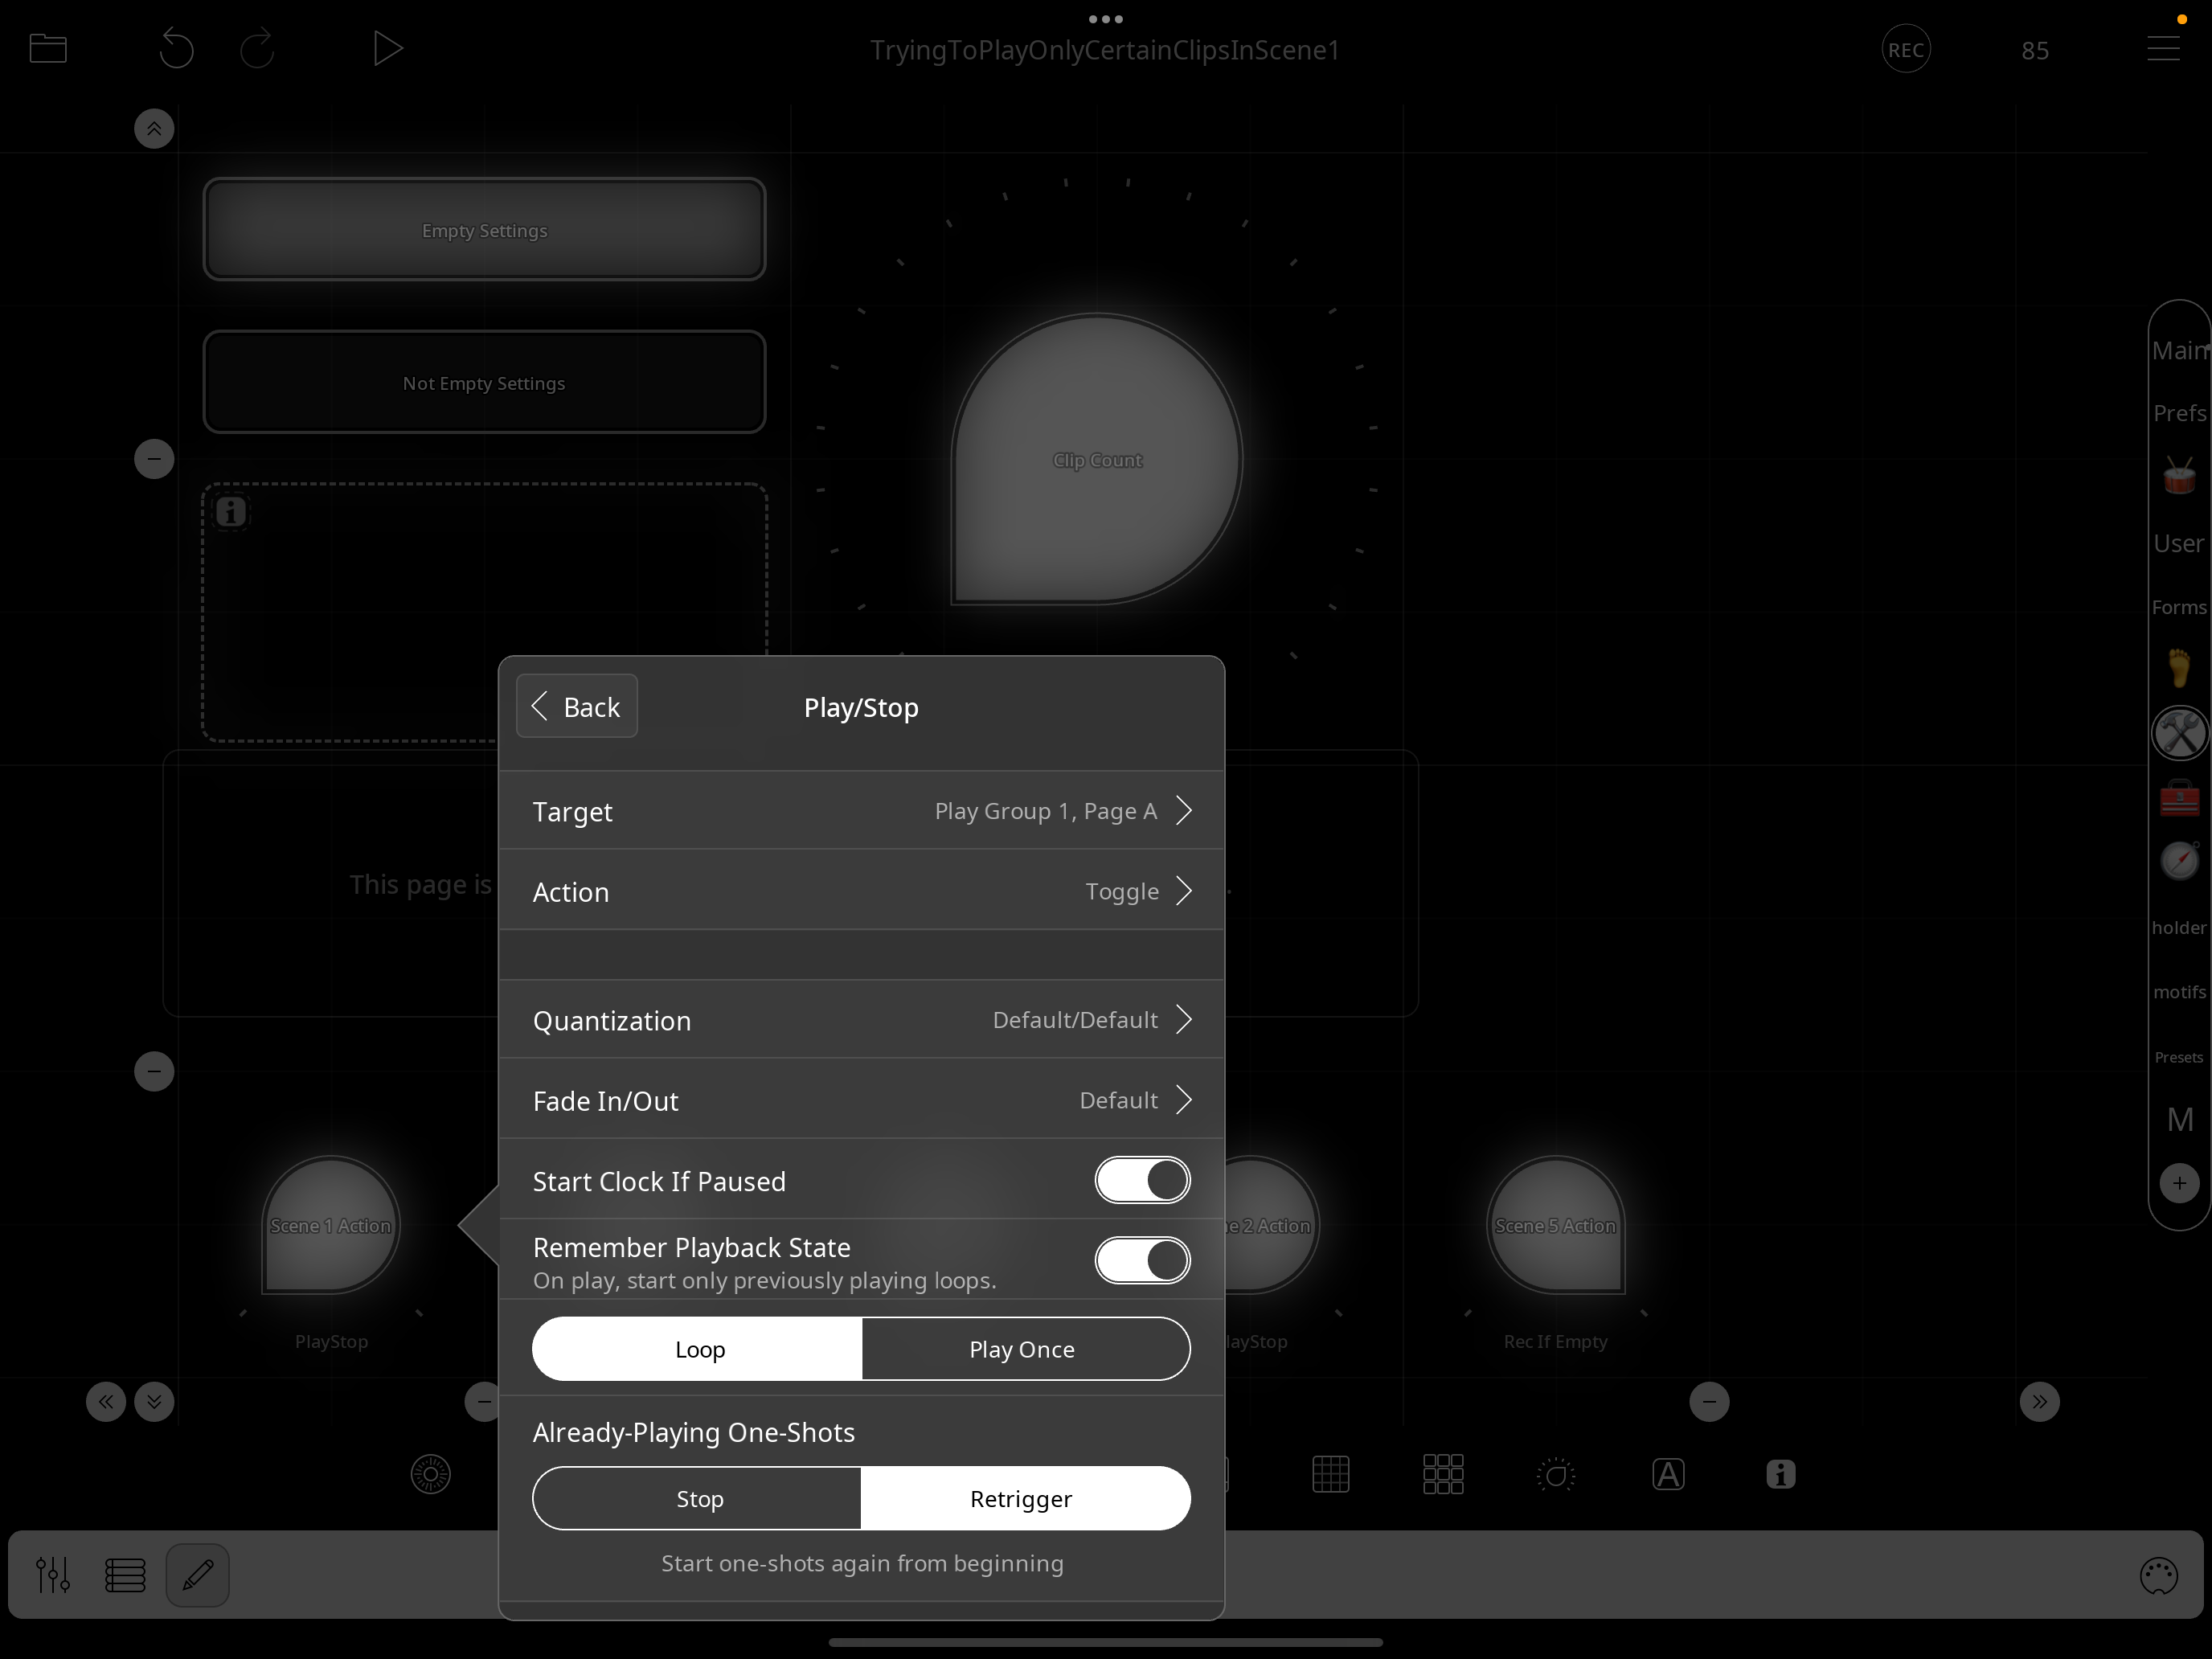
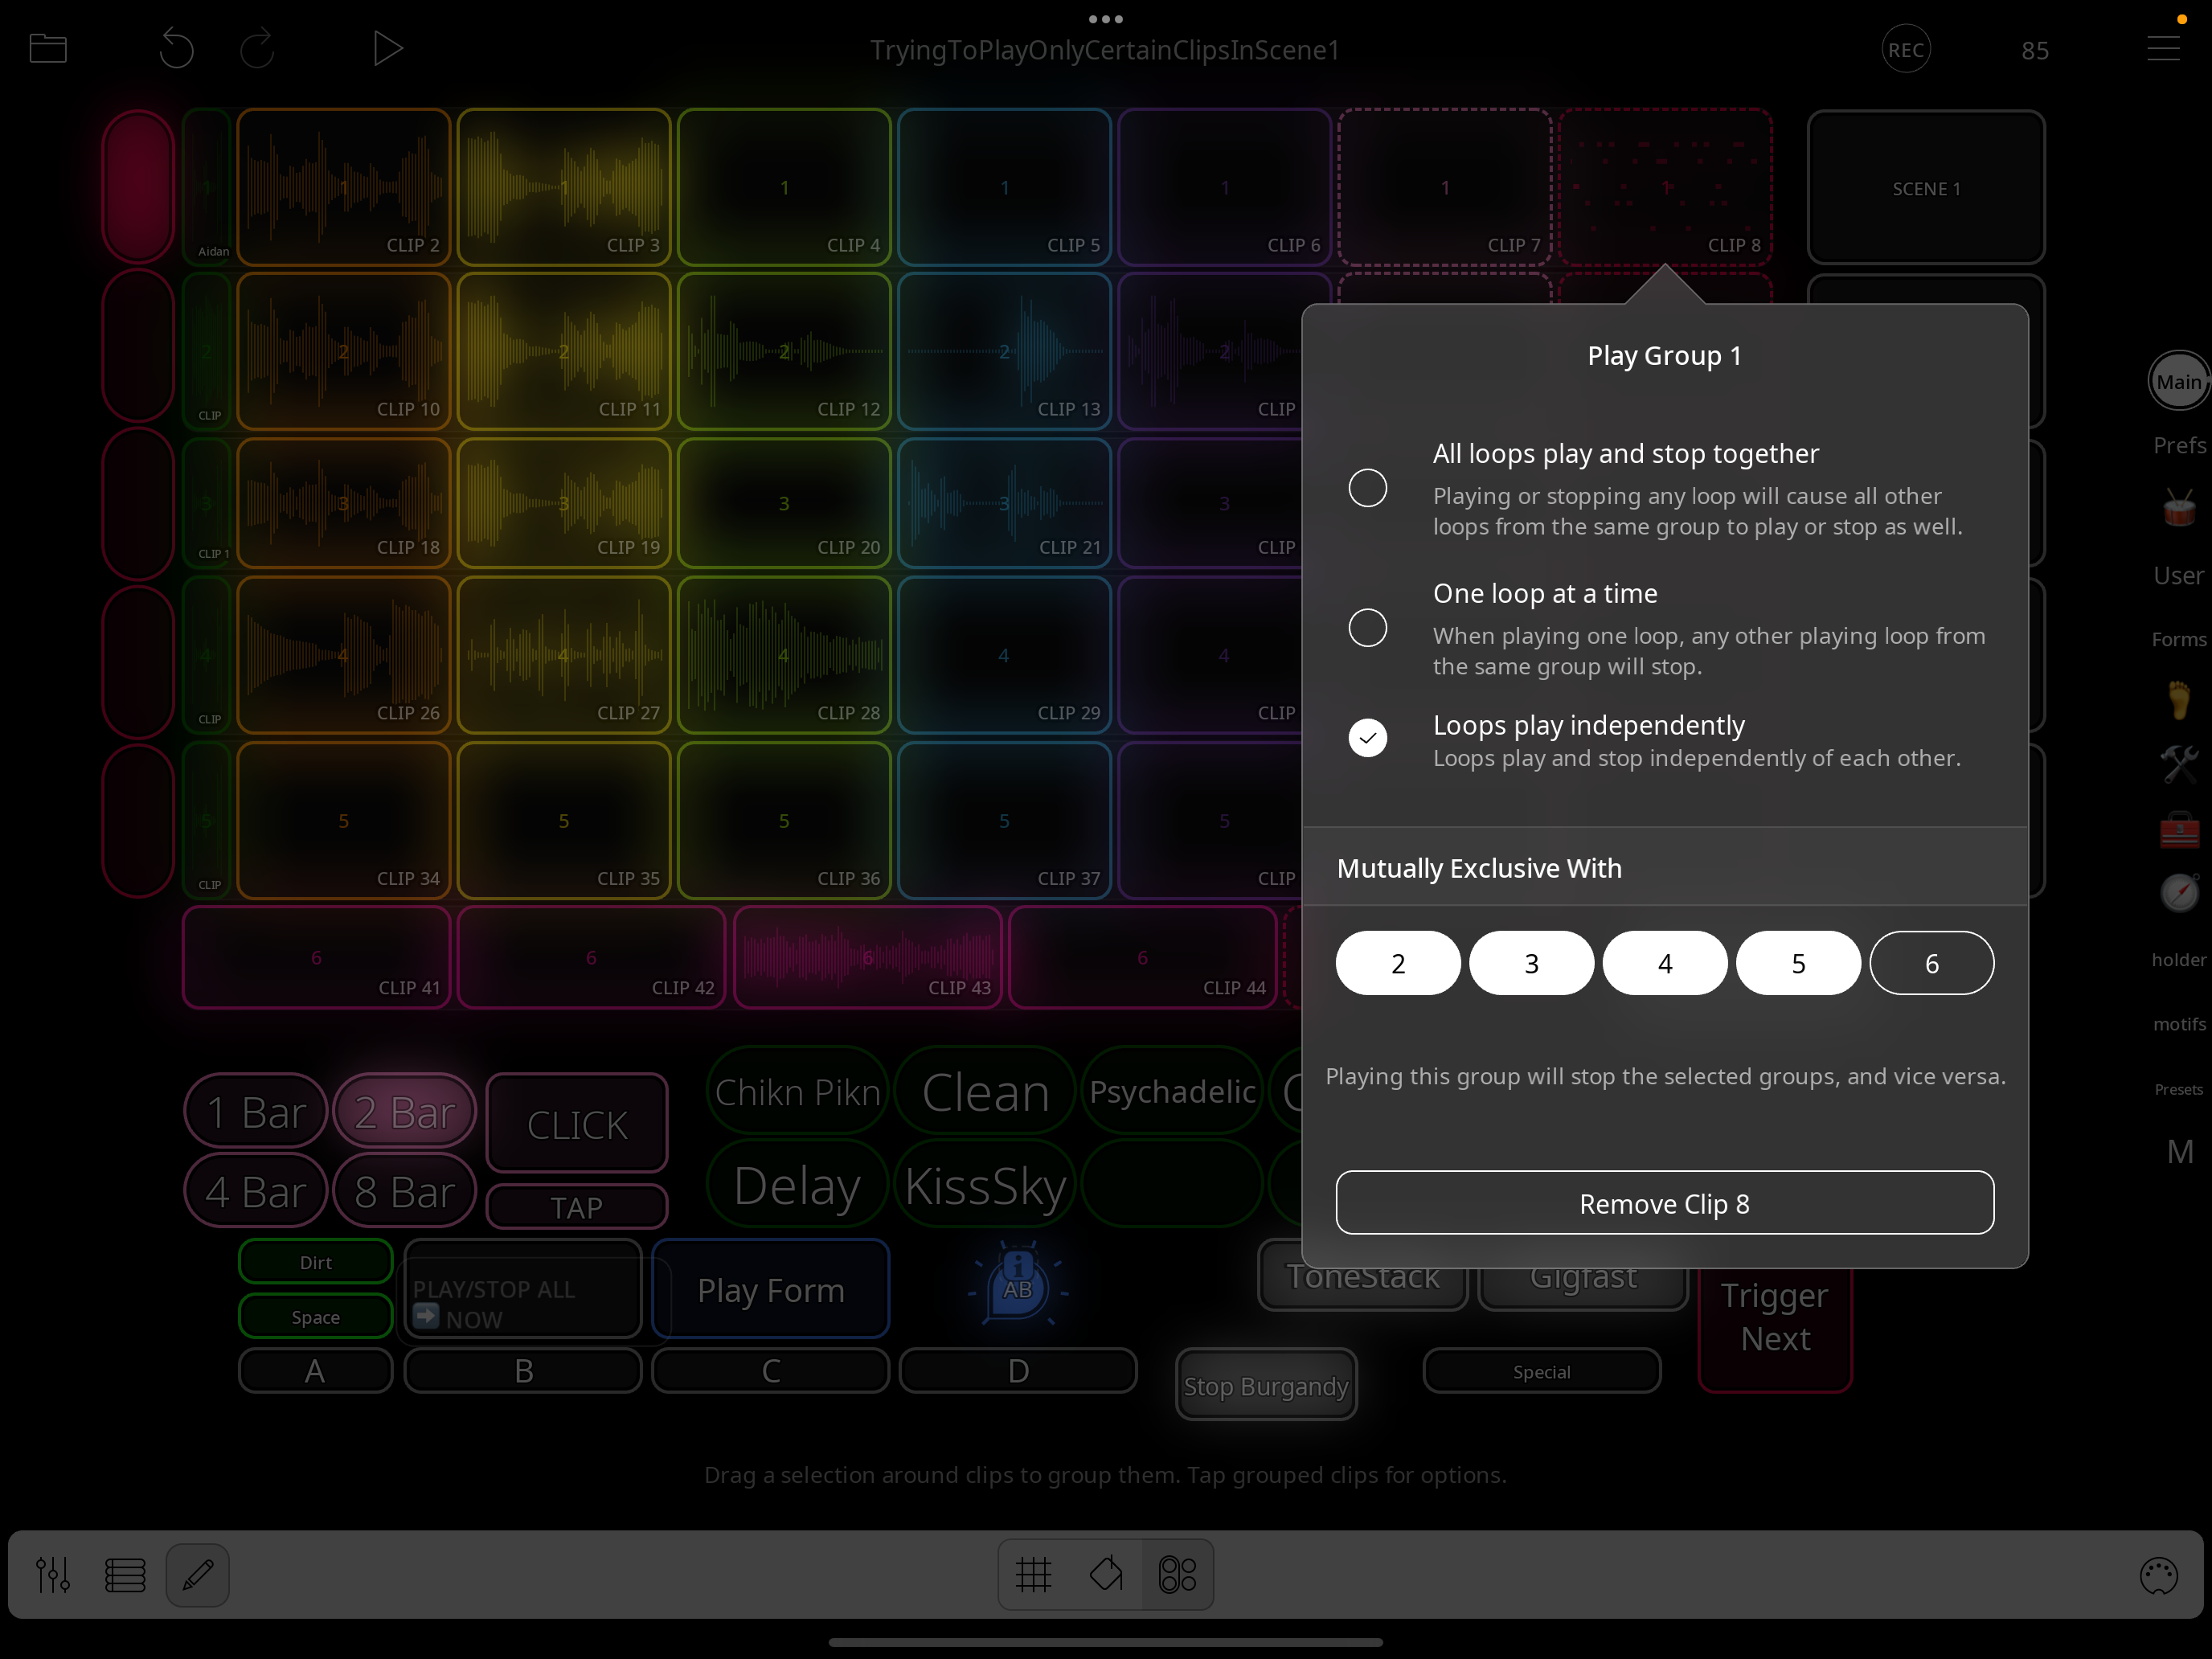
I'd like to be able to start the play group in Scene 1 with only or two of the clips playing, likely just the orange one.
But when I click on the other clips in this play group (in order to turn them off) and then hit the "Scene 1" button to trigger the play group, all clips play, ignoring the fact that 2 of them were deselected/off.
I do have this play group set up to play clips independently and the Play/Stop action in the step dial is set to "Remember Playback State" but it seems that these settings may not be honored until the play group has played through once.
Any ideas?
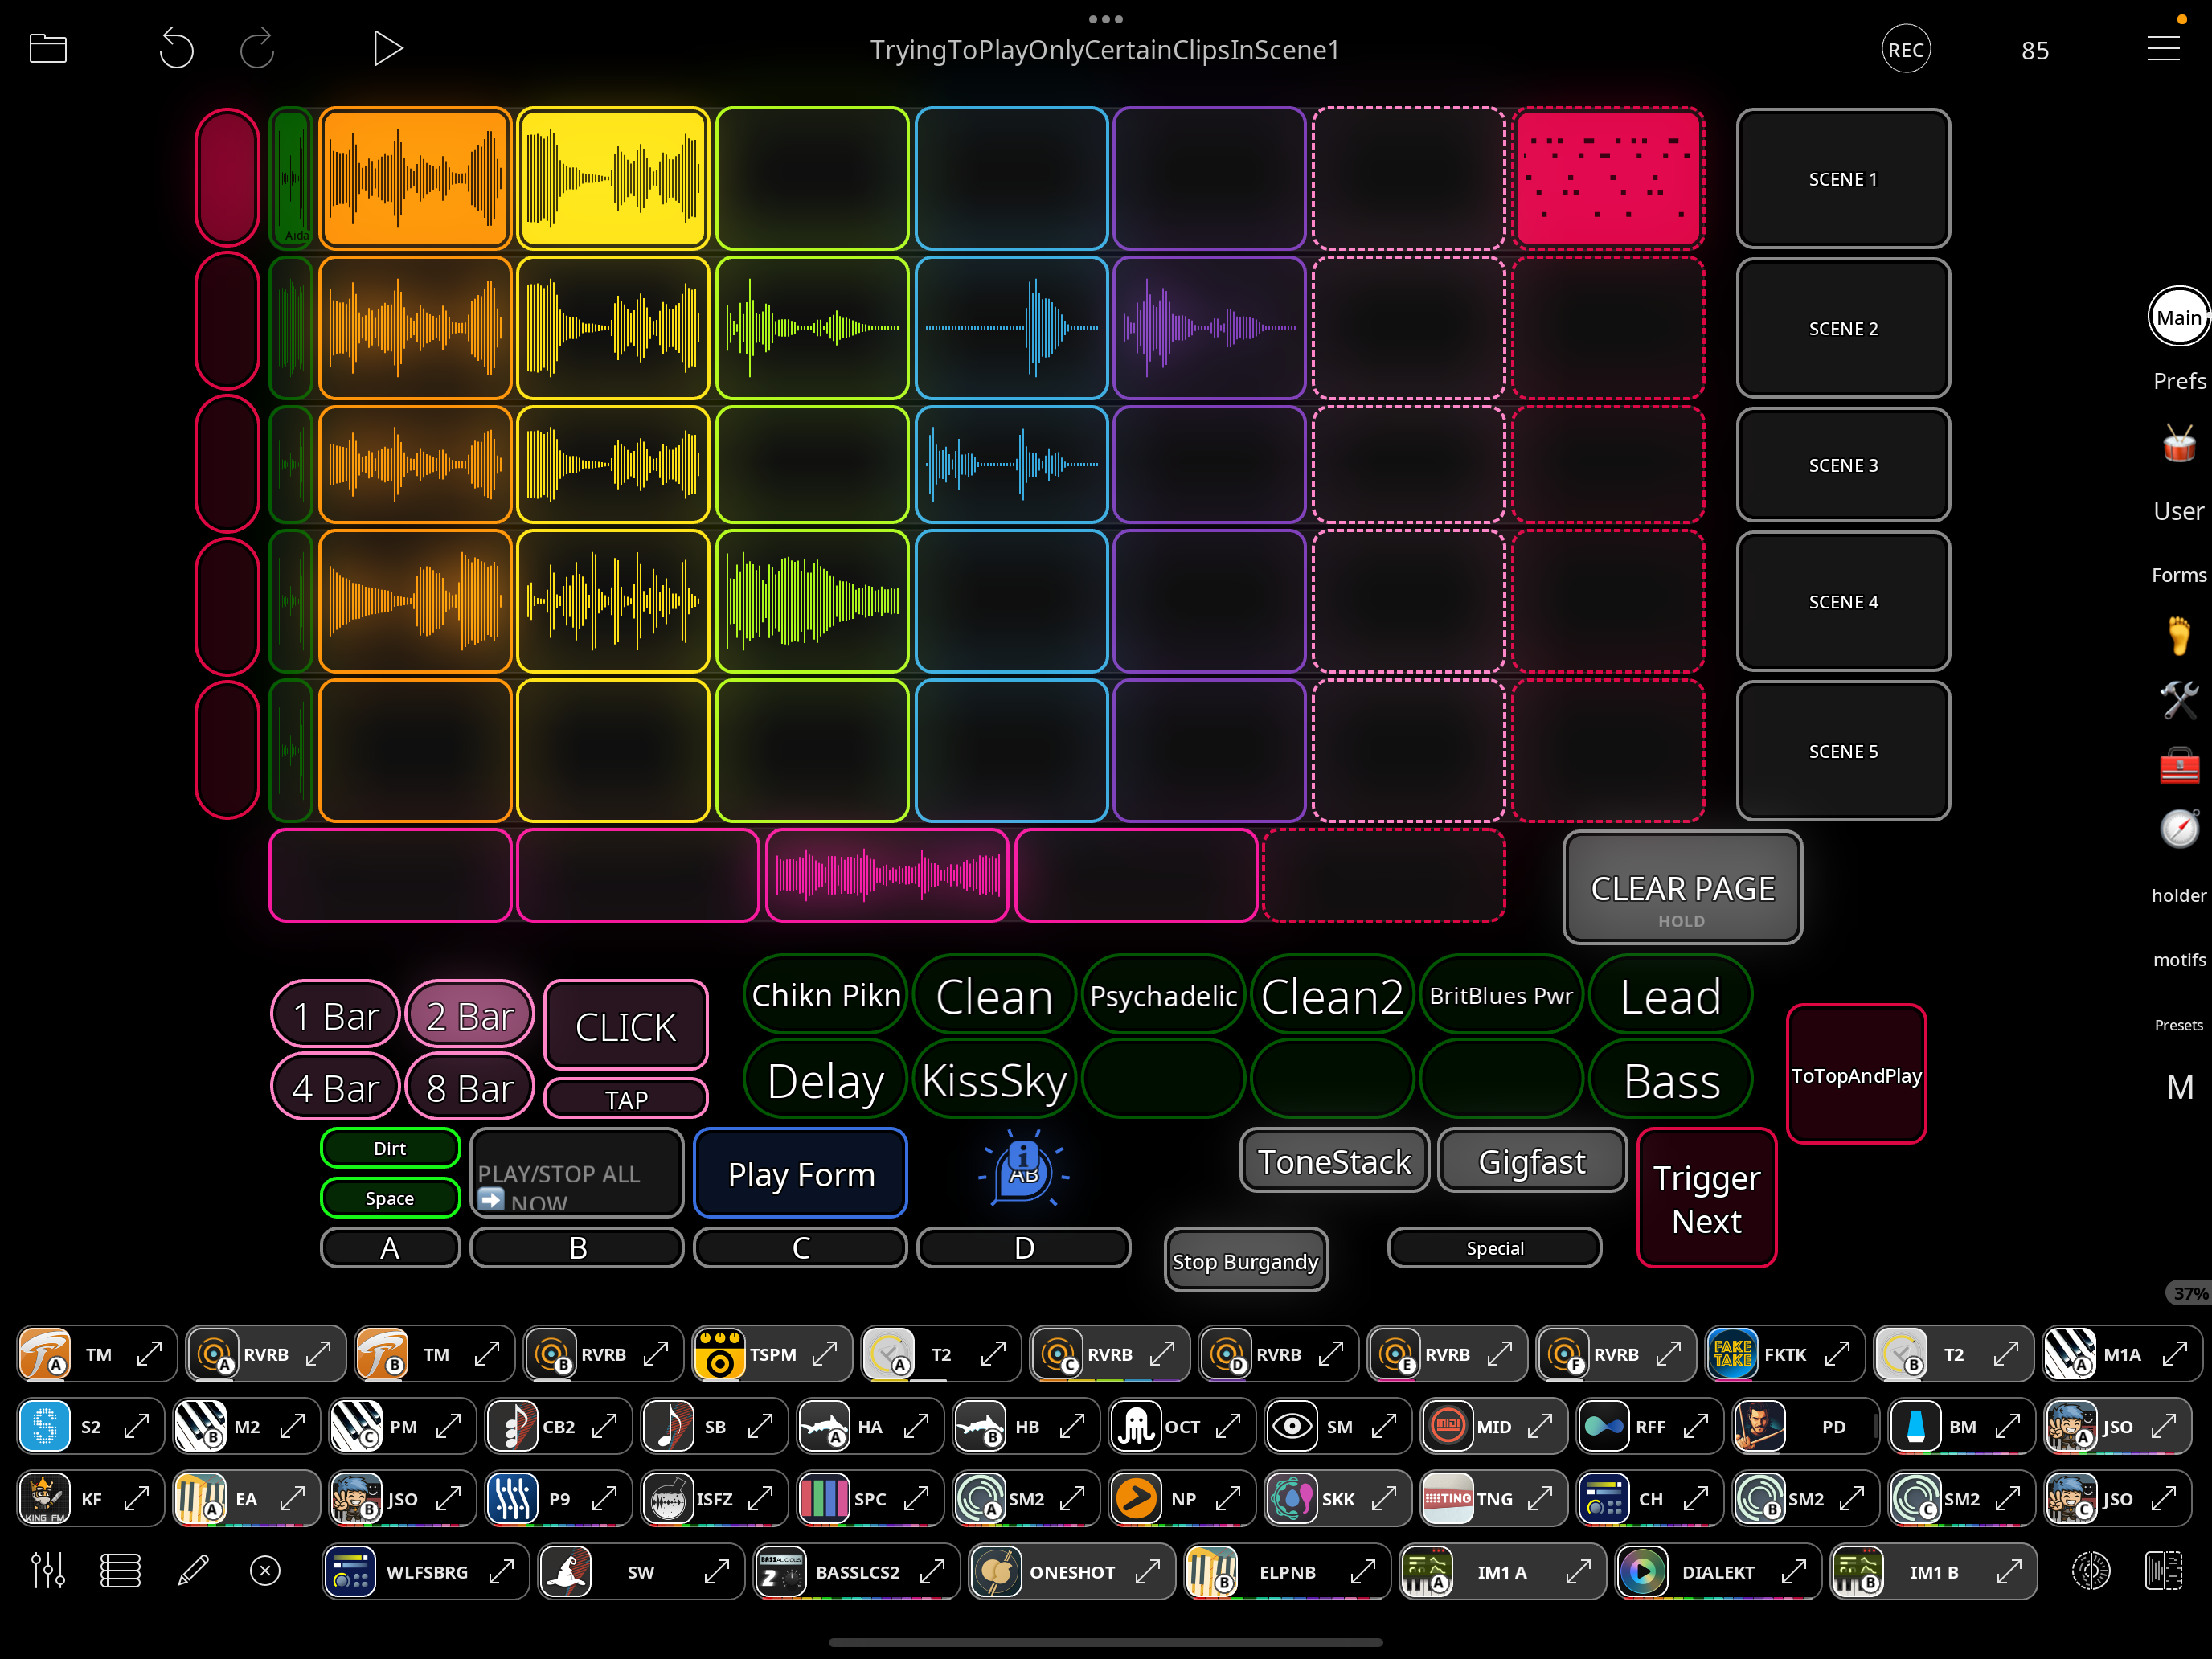
Here are some screenshots:
Comments
@danm : if you have put clips into the state you want them in while the transport is stopped. Start the transport rather than trigger the group. Until the clips have actually been playing there isn’t a playback state to remember.
Ya, this is the workaround that I've been using, was just wondering if there was another way, thanks @espiegel123
@espiegel123, I'm also running into an issue with using the nav part mode approach, as shown in this vid:
https://www.dropbox.com/scl/fi/nyc0y7sb0bocvx5o3fvlg/EdTemplateQuantQ-ScreenRecording_12-01-2025-17-36-18_1.mov?rlkey=grx17aiisft8b0luncb6lw289&dl=0
It seems you may not have done past row 3 or 4 in terms of the functionality or perhaps it's just some unexpected behavior, but either way, if you might be able to give me a couple pointers as to why this might be happening, I'll work on it myself. Just given the complexity and indirection going on in the template, some info would be greatly appreciated (if you happen to remember these details).
What the video shows is that I hit the play button, then I hit the "A" button each time a play group is playing in order to advance to the next scene. All works as expected (each scene's clips complete and then the next scene's clips begin playing) until I get to Scene 4 and while Scene 4 is playing, when I hit the "A" button to tee up Scene 1 to play next, there seems to be an issue with quantization as Scene 1 starts to play while Scene 4 is still playing.
I've been looking at the different control profiles and action timing and the countdown and step stepdials as well as the "scene action" stepdials, which are all set to "PlayStop", but unsure what the issue is so any pointers are welcome.
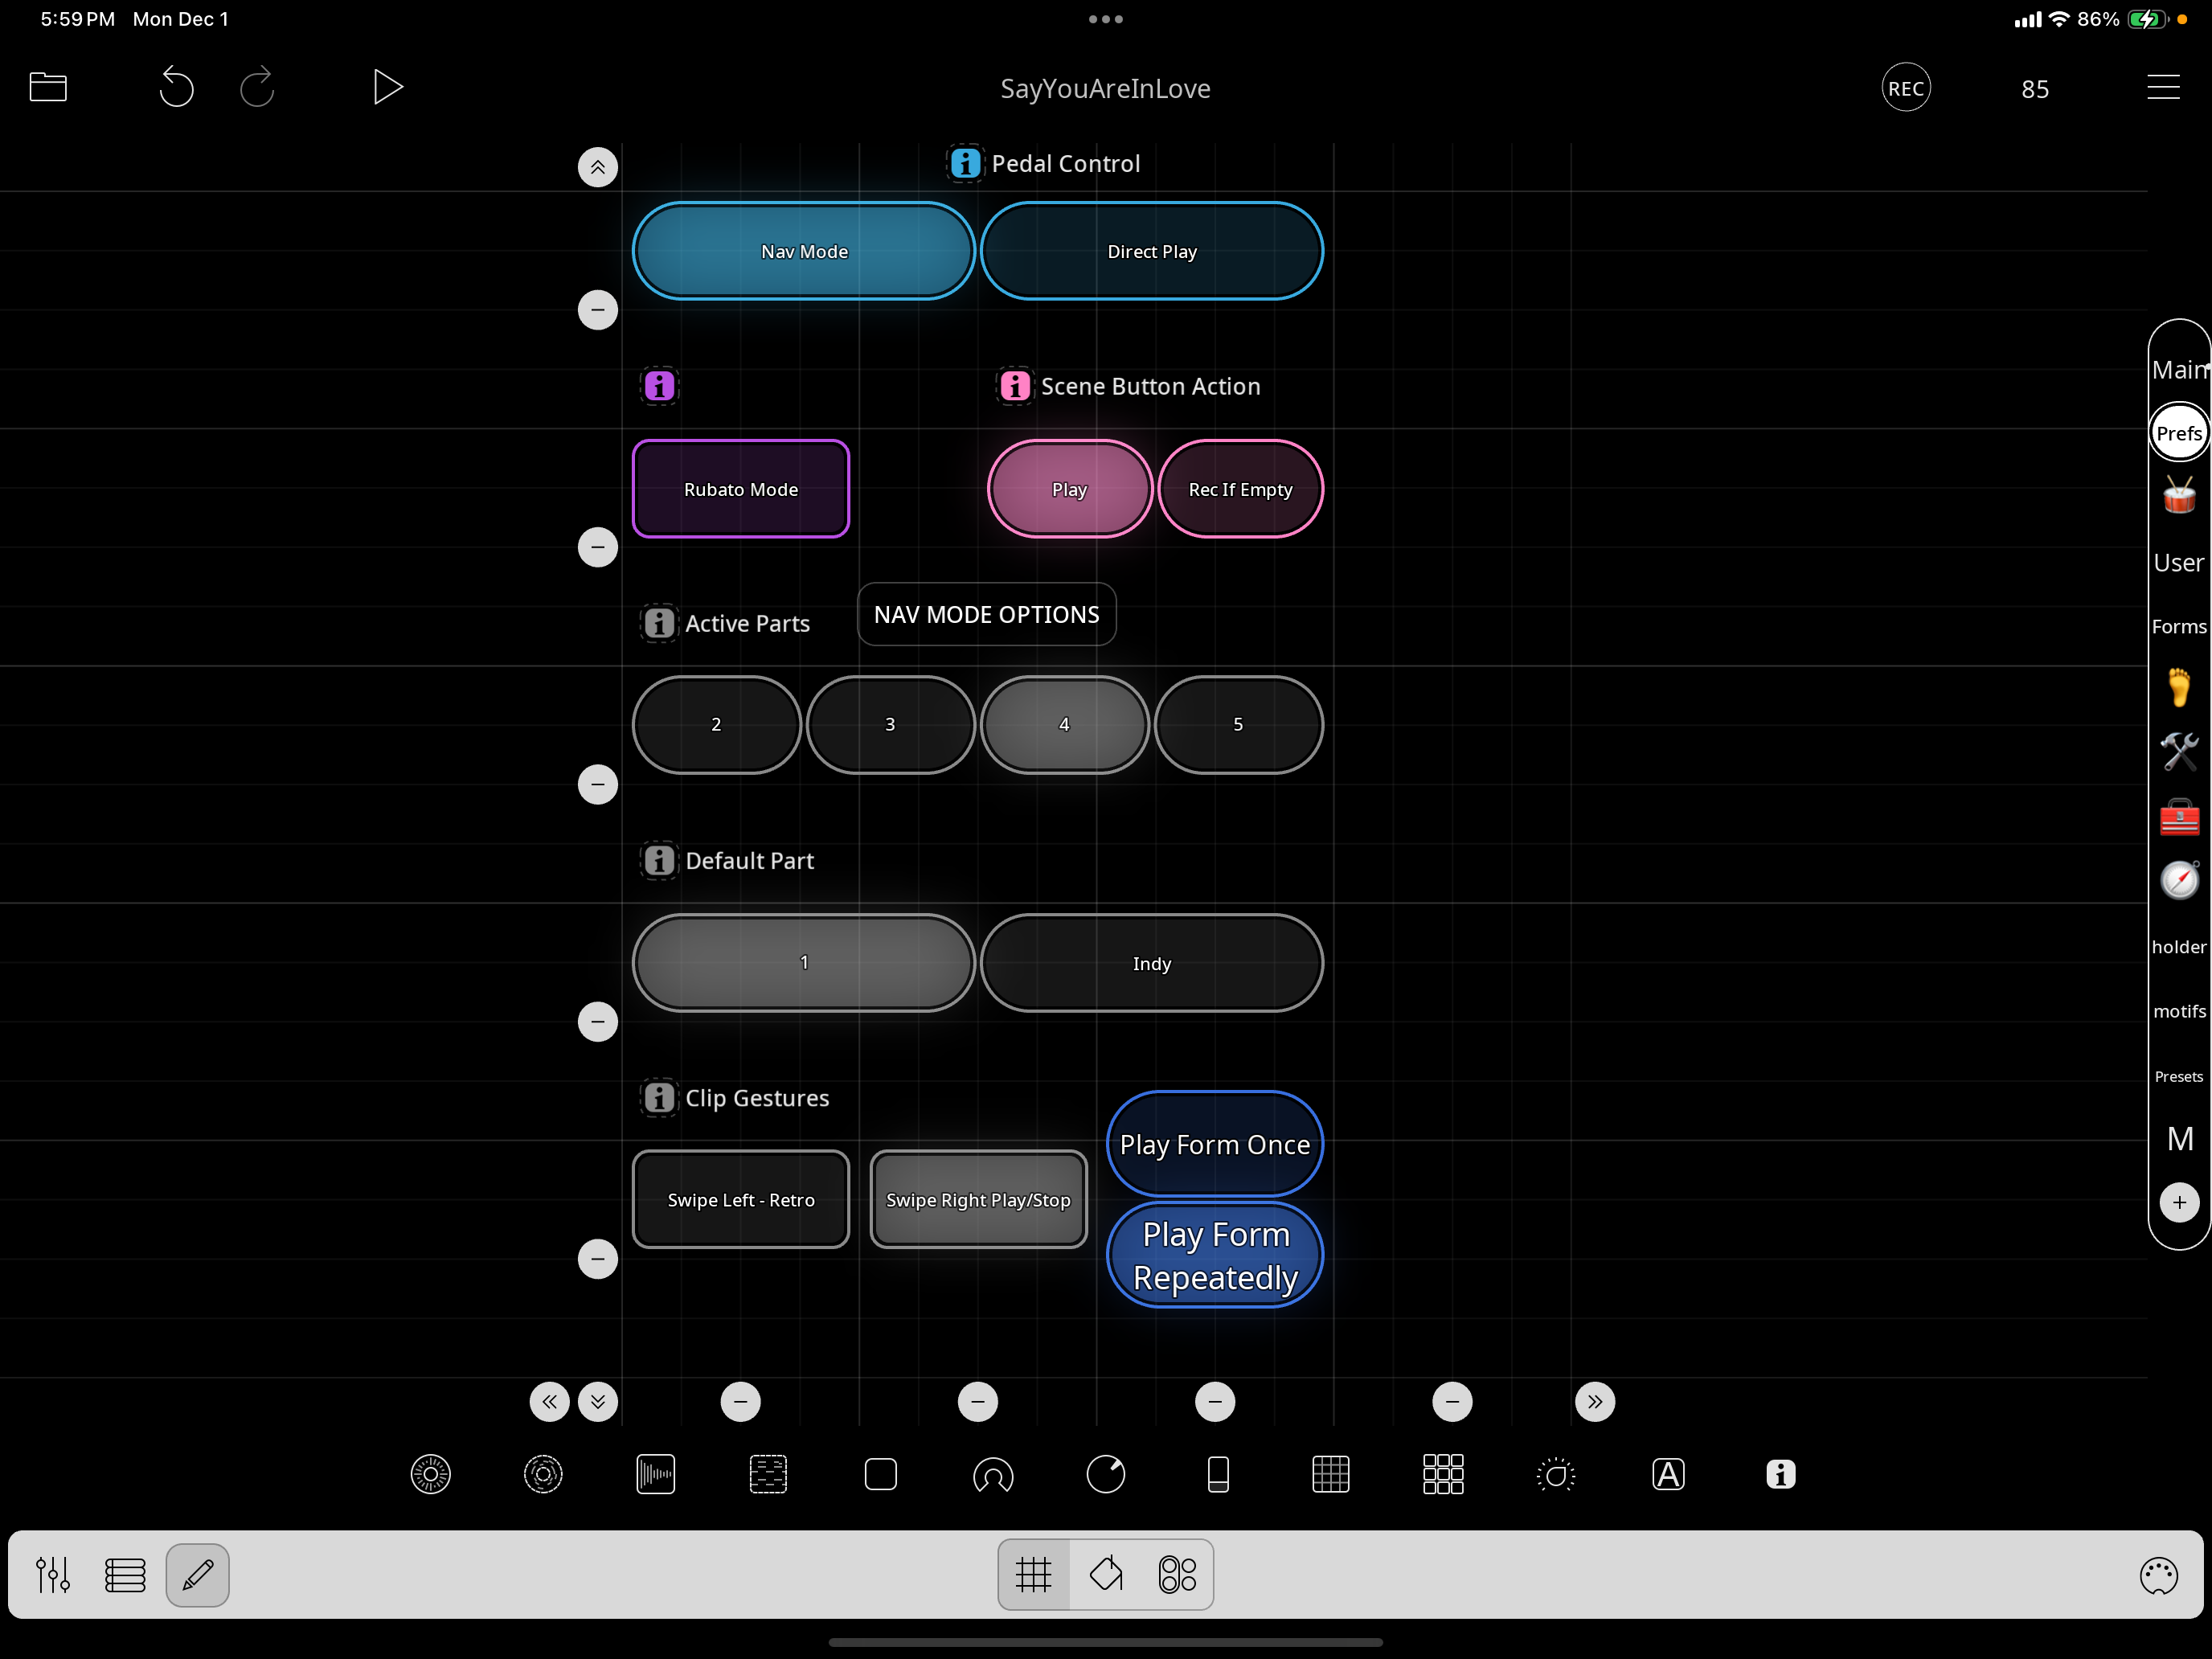
Here is the prefs screen
Thanks
@danm : adding rows for nav mode requires a number of things.
The nav and countdown dials need modifying. Did you go so? I am not sure why you are getting that result. In your screenshots you show only 3 rows set to be active . When you made that video was it set to 3 or 4?
@espiegel123, where do you see 3 rows active? I have it set to 4, as in the screenshot
My mistake.
If you record just one clip per row, does the same thing happen?
If you have three rows active does the same problem happen?
When you cycle back to the first row before triggering anything , look in control settings. Is row 1’s profile the only active row profile?
I'll try all this shortly...
On your last request...do you mean when playing is paused and I hit A to get the radio button up to row/scene 1?
If that's what you mean, then Row1 appears to be the only active row profile, but here's a screenshot:
One clip per row misbehaved at the same time/place but in a different way...when row 4 is playing and I hit button A, the clip stops playing immediately and then the clip in row 1 starts playing after a brief delay
I have a suspicion it has to do with the fact that I have Perform Count In turned on and something to do with this:

Since it is Clip 26 that stops immediately

Will test this one shortly
@danm : what I mean is for you to repeat your steps until row 4 is playing. then advance the row but don't trigger anything. at that stage row 1 should be the only row profiles that is active.
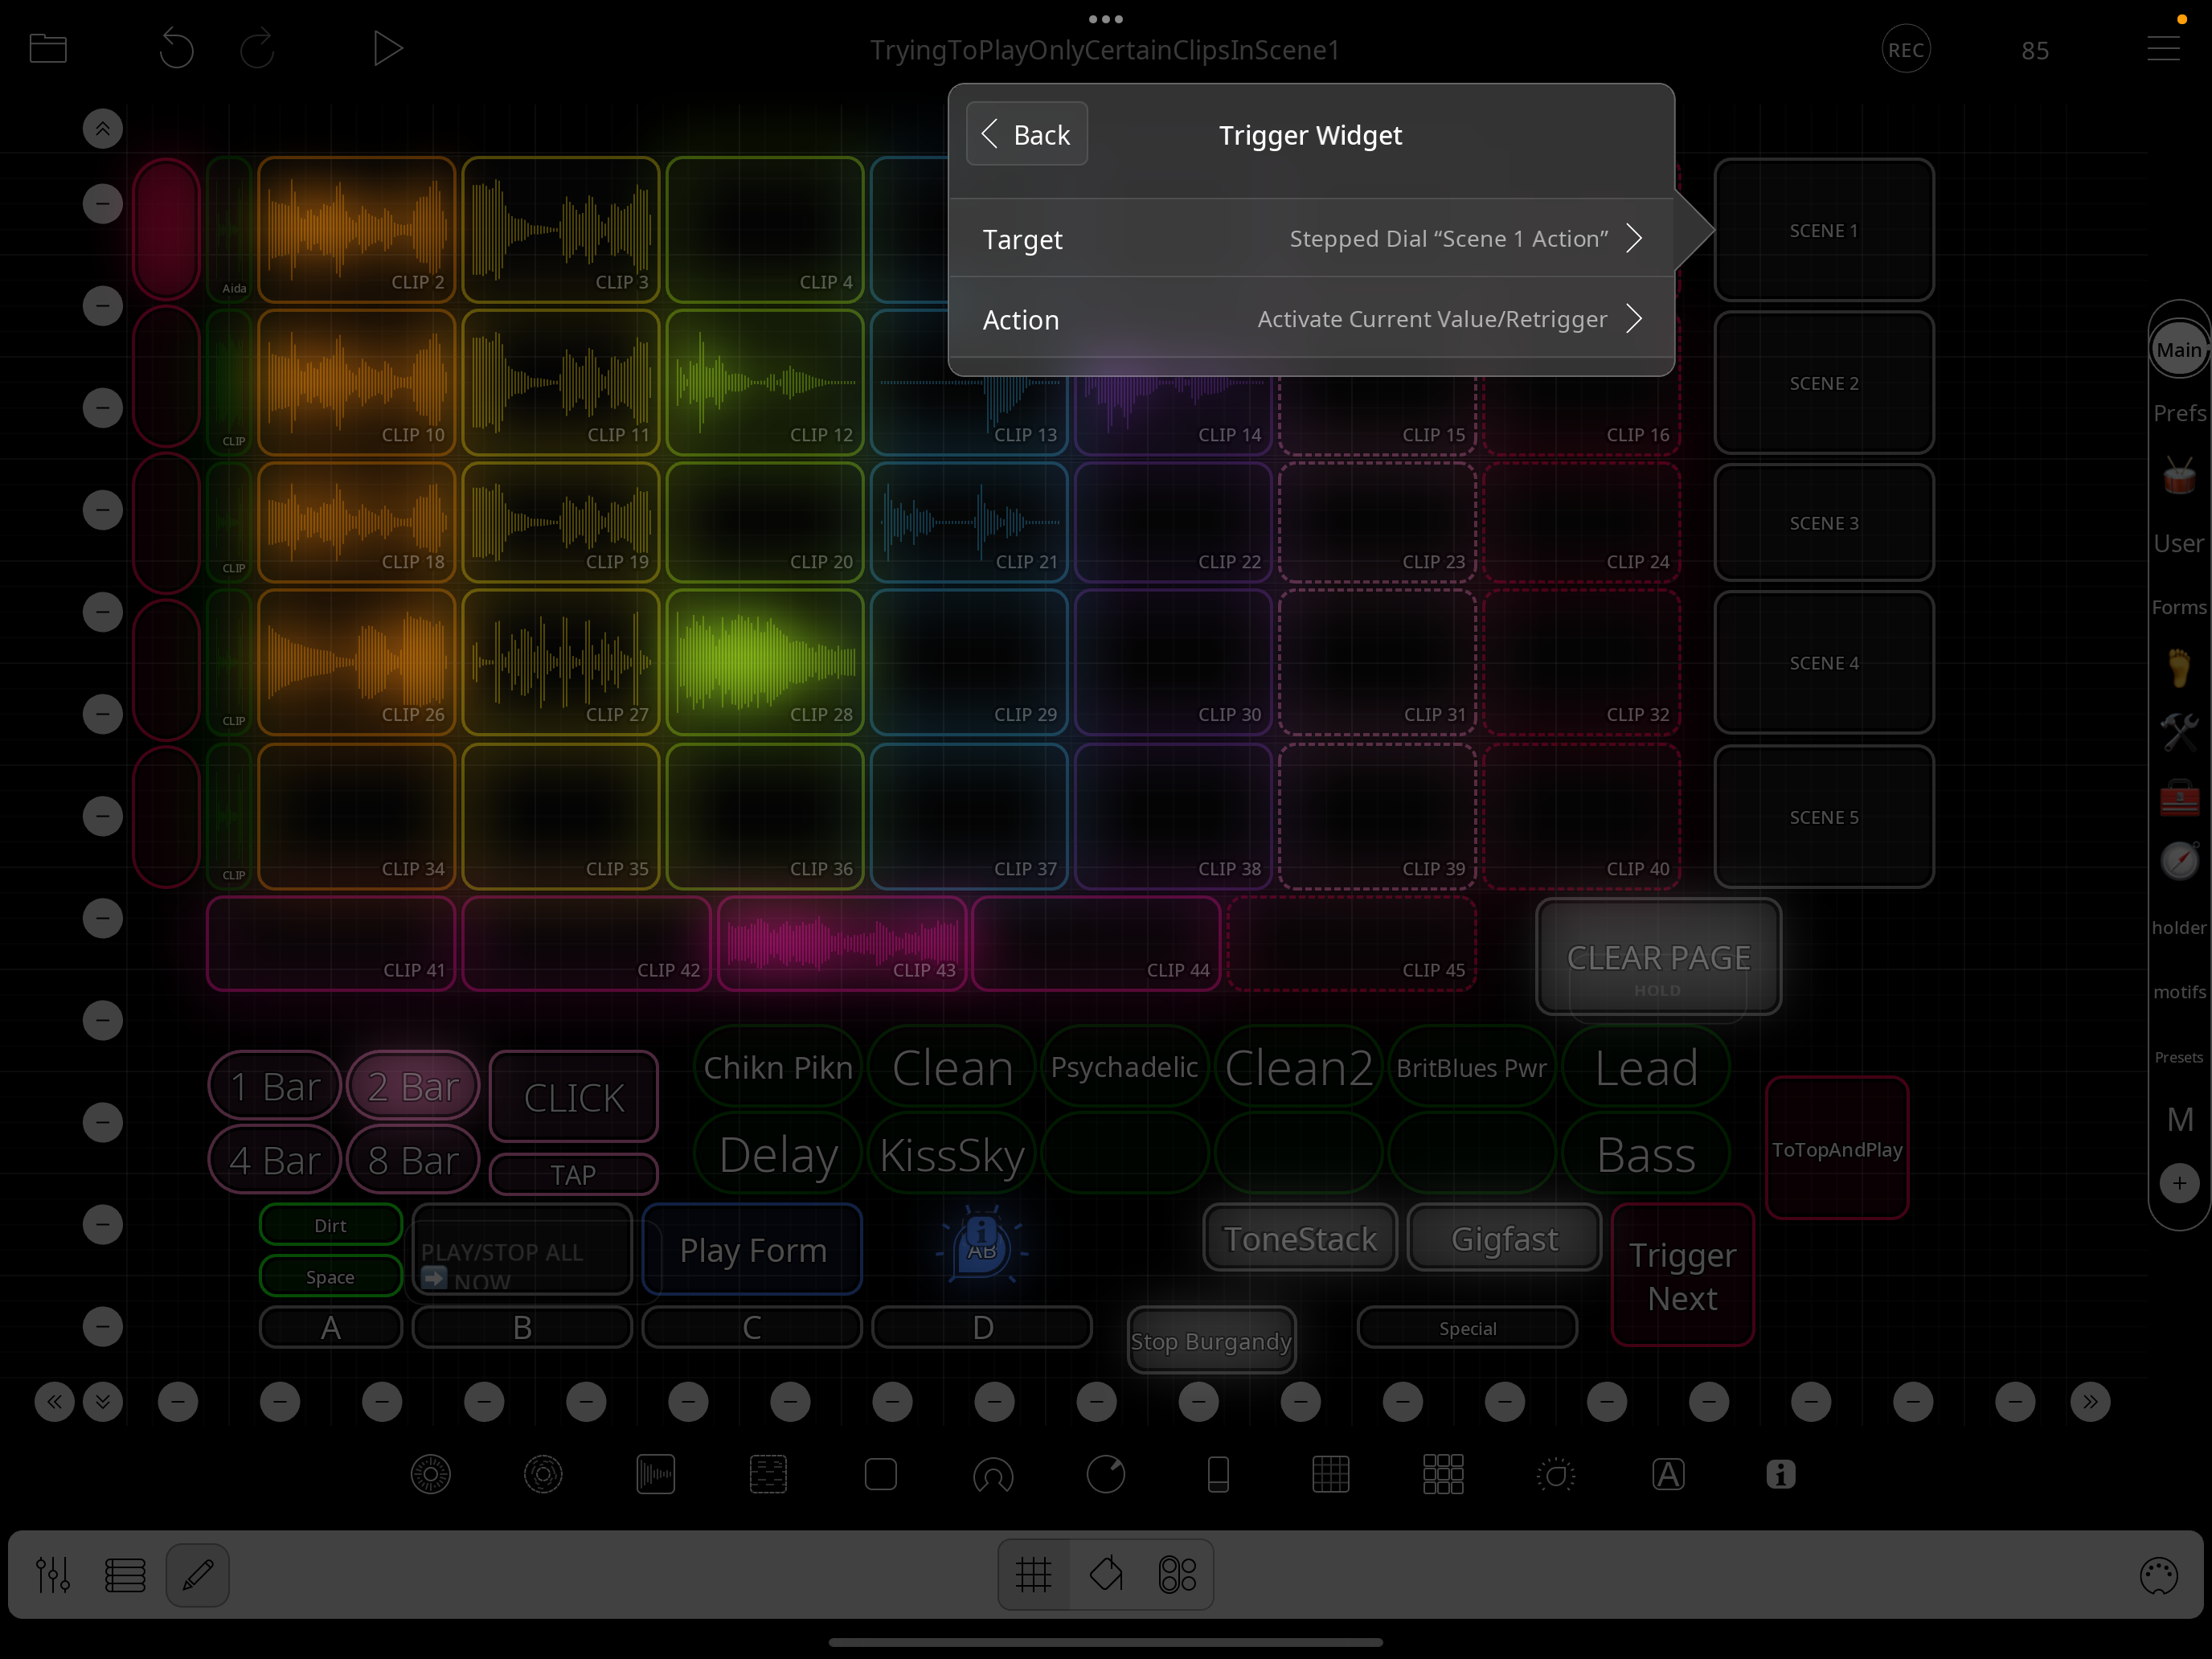
Tapping A by itself should not cause any play states to change at all. It should only change the targeted row. Look in the control profile for row4. Post a screenshot of it. There should be no CC20 binding. It sounds like there might be.
Okay, I now realize why I was confused by your "don't trigger anything" reference.
One of the updates I made at one point, is to have each scene play automatically when that row is selected, so that's what's happening. But yes, I looked and only row 1 profile is active at that point
So, it seems like it must have something to do with whatever you changed to automatically play. If I add a row and update all the necessary things it works as expected.
Likely so...I voided the warranty! :-)
Need to figure out where I added that bit...
Do you remember if your original template had the third action in each of these radio button selects?
(ie: the Play Play Group x action)...perhaps that's what I added to trigger each one automatically
Not sure that would cause what we're seeing, though...likely something else, I'm guessing, so need to explore further
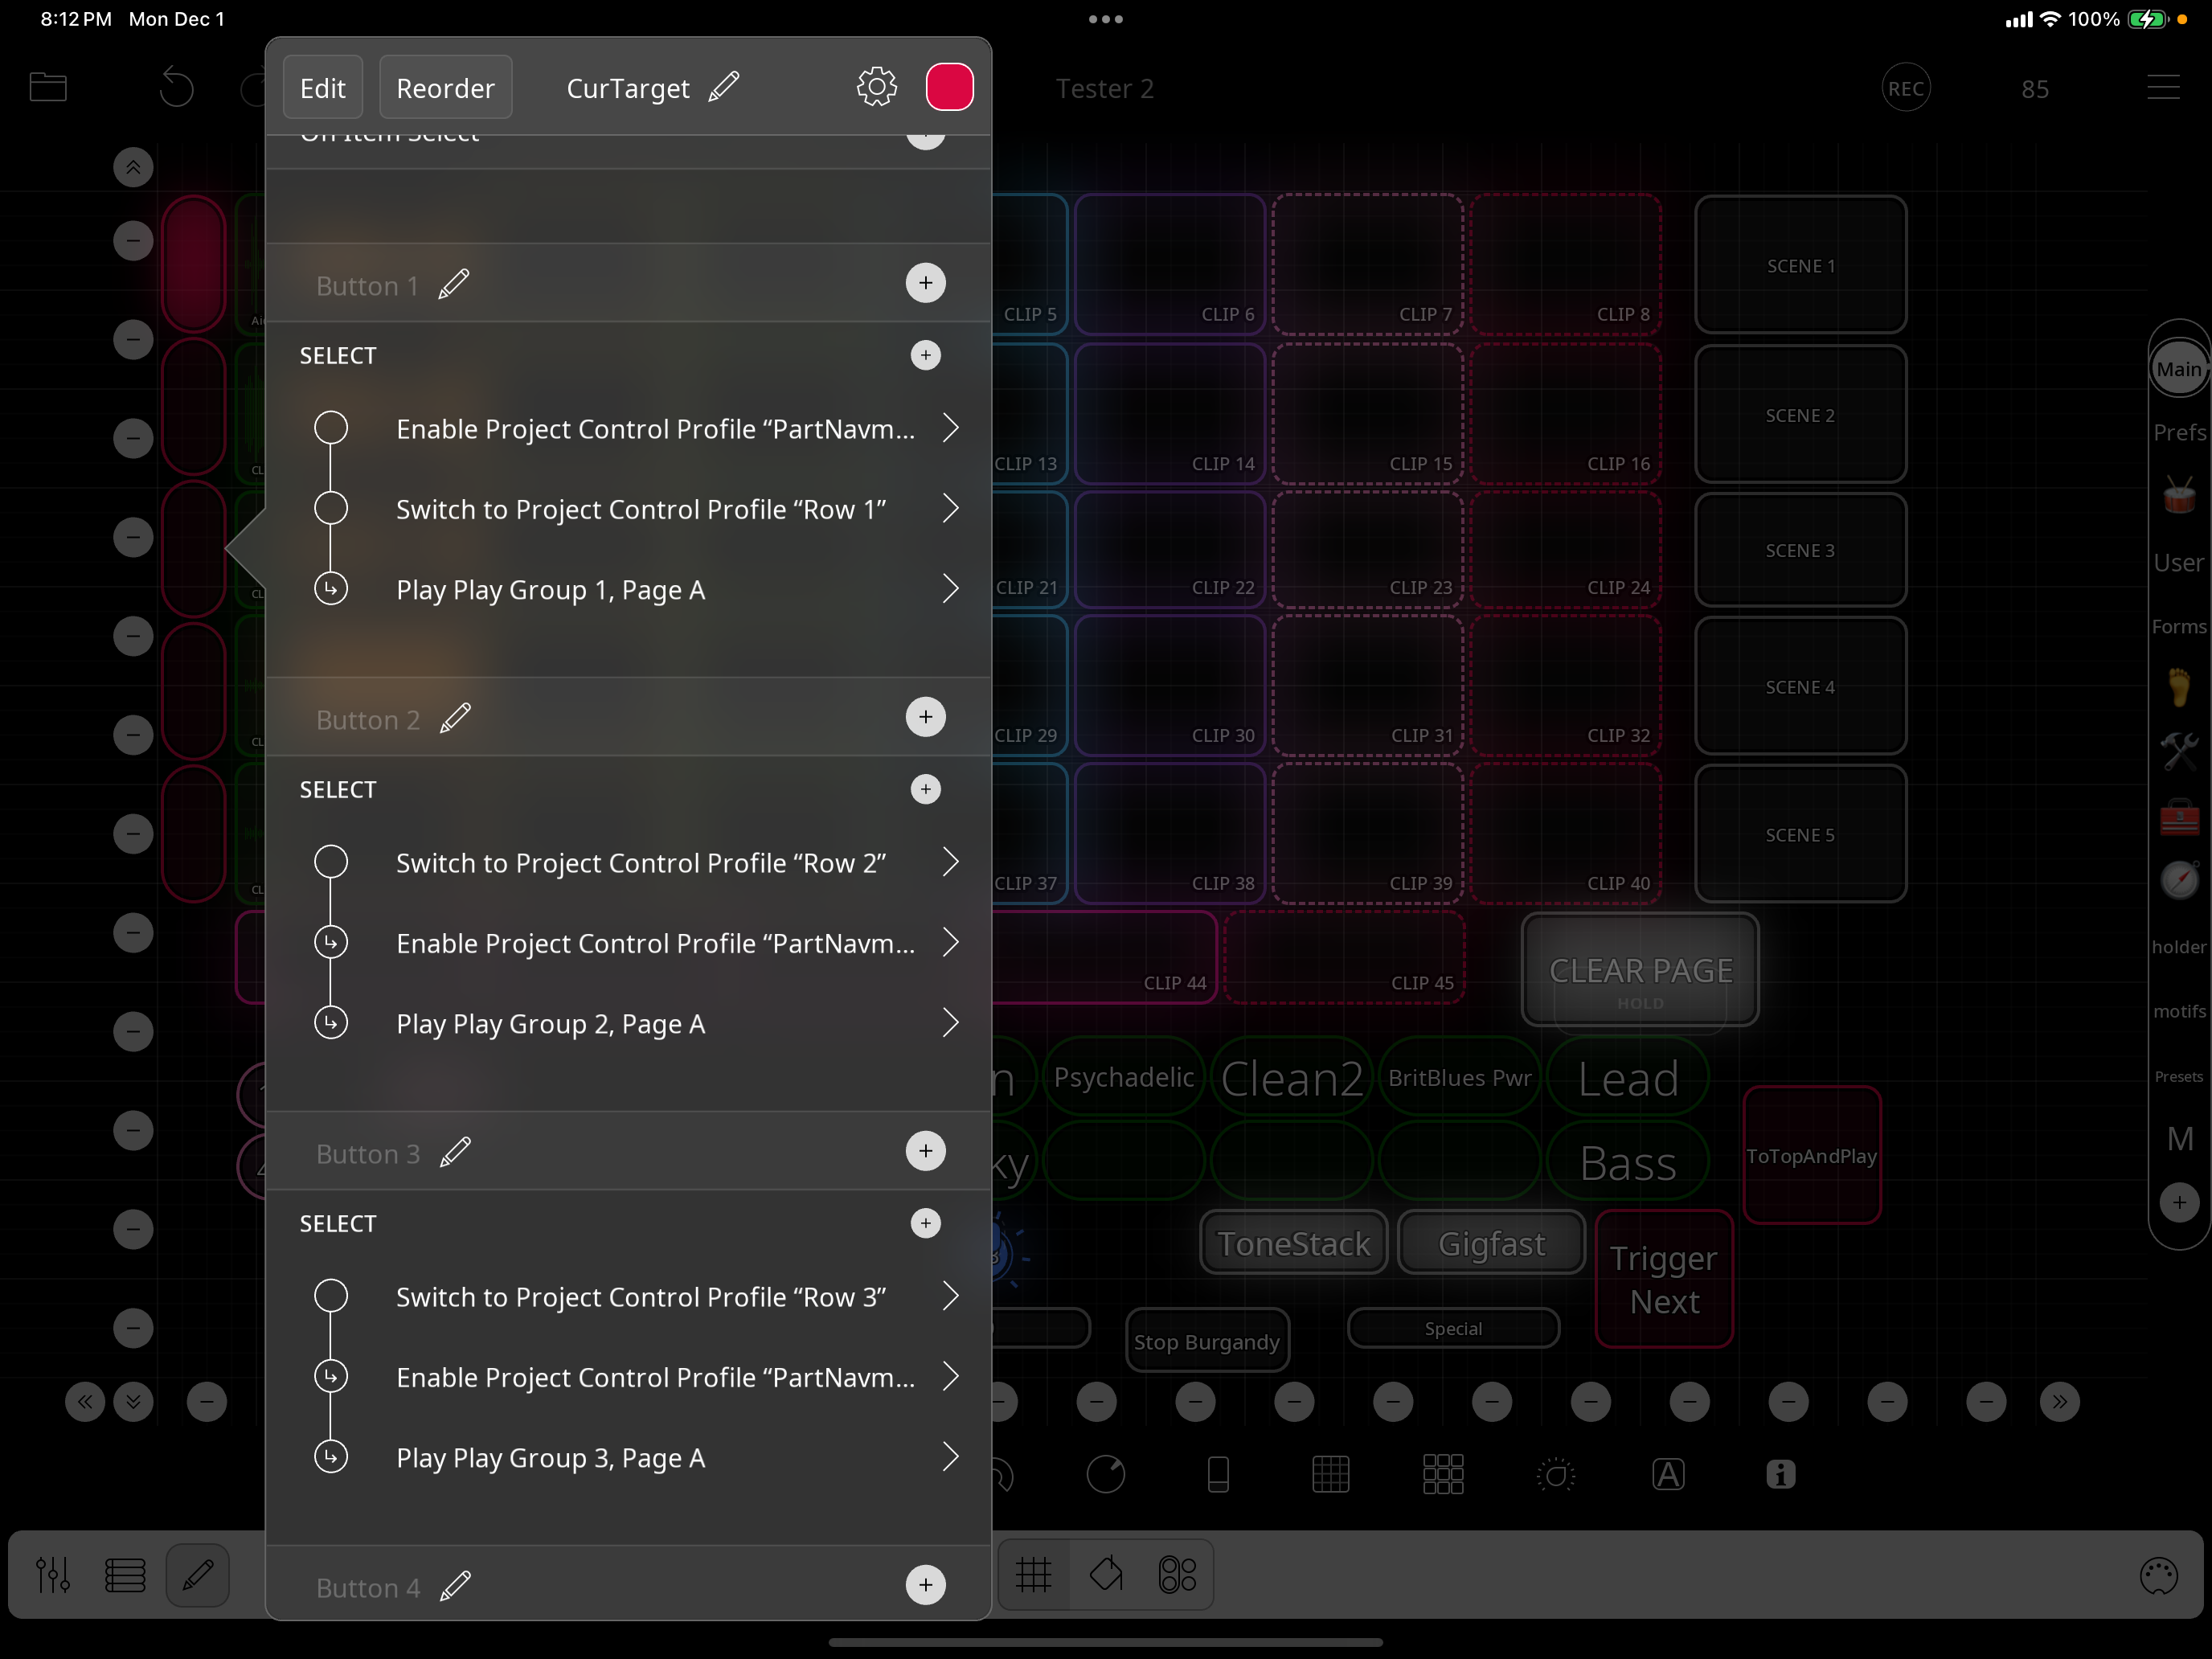
Definitely not. Nav mode is set up so that selecting a cell merely makes the row the target for triggers.
When modifying a project, I suggest keeping the original around for comparison.
I have the original, so can check it, but without any search capabilities it's really hard to do any kind of easy sophisticated/deep comparisons, it's all very manual, which is pretty challenging given such a complex, env, as you know.
That's why I wanted to get some of your thoughts, since 99% of it is what you provided, so figured I'd ask since I thought you'd have some ideas on what/where
I also recommend making notes when editing a project. I always have a text or tutorial widget in a project where I log and date my changes so that it is easier to know what I might have broken and when.
Great idea. also, out of interest, how would you implement the "play immediately (honoring quantization)" when changing scenes?
Maybe my earlier answer wasn’t clear. Those radio buttons don’t have play actions in the original. That would break the originally intended work flow.
The original work flow is to to use A to change the row targeted by B C and D
Got it.
Any thoughts on how you would implement the '"play immediately (honoring quantization)" when changing scenes' workflow?
Just wondering, since that's what I find most useful
It should just work. But you then have to be careful not to retrigger the clips once they are counting in. Notice that there is a direct mode where tapping a pedal triggers the scene
Compare the behavior of the scene buttons to your radio buttons and compare the actions.
Will do. Also, can you remind me the semantics of how you use CC 20 and why you did it that way, with MIDI COMMANDS mixer color...Thanks
To simplify midi learning the pedals. Without that any double-tap and hold bindings need to be learned. This method allows one to midi learn just the pedals on the pedalboard page. It makes it much quicker for people to set up midi bindings for their footswitches
Got it.
One of the things I'd like to update in this template is the recording approach, as I always prefer count in with a pre-set bar length if possible and currently it defaults to threshhold recording. Any thoughts on 1) If trying to update the template to this approach would be challenging due to how you originally intended it to be used (2) If you think it's do-able, if you can provide some (high level) specifics relating to which settings you'd look at, what might be changed, and how you'd go about it and I'll start exploring ... just would be nice to have some context, given how I can see that trying to morph this too much against the original workflow intent may not be valuable time spent...Thanks
@danm: see the Empty Settings/Non-Empty settings buttons in the tool page and change their actions
@danm : I will add a switch on preferences for the threshold switch.
@espiegel123, are you saying you plan to update your template? Is there somewhere I should be checking to see progress/updates or will just re-post each time you update something? If the latter, I'll just stand by. Thanks
The template I posted was a draft for feedback. I’ve made some tweaks and will be posting updates as I tweak it.
I’ve posted version with an auto threshold switch and a few other minor changes at:
https://wiki.loopypro.com/Templates:Edward's_Workbench#Scenes_Example_In_Progress