Loopy Pro: Create music, your way.
What is Loopy Pro? — Loopy Pro is a powerful, flexible, and intuitive live looper, sampler, clip launcher and DAW for iPhone and iPad. At its core, it allows you to record and layer sounds in real-time to create complex musical arrangements. But it doesn’t stop there—Loopy Pro offers advanced tools to customize your workflow, build dynamic performance setups, and create a seamless connection between instruments, effects, and external gear.
Use it for live looping, sequencing, arranging, mixing, and much more. Whether you're a live performer, a producer, or just experimenting with sound, Loopy Pro helps you take control of your creative process.
Download on the App StoreLoopy Pro is your all-in-one musical toolkit. Try it for free today.
Comments
The little R button (top right) of the actions panel resets it (will show start). Also double tap the song or sequence stop button resets it.
As you will notice actions modify data - transpose say, so unless you program in a reset of the transpose, use the snapshot when the sequence/part is reset to restore as a starting position.
Yes, you can copy & paste a list of actions between sequence/parts.
Something to be aware of, actions are stored in versions, so if you program in ab action to restore a version the actions are replaced - so make sure they care copied/pasted into versions (you can edit them) if doing this during a performance.
Excellent. Can I program in the R as one of the actions for 5 loops say then carry on with more actions?
not quite - R is a button you press to reset - use the "Restart Actions" to reset to start, but you can't then carry on.
E.G. you would do this
5 Reset Actions
4 loop x1
3 Transpose +1
2 loop x1
1 Transpose -1
which would play one loop untransposed, next loop is -1 semitone, next loop is untransposed (-1+1=0), next loop is -1 again etc. So Reset Actions action is a loop to start.
Nice one. Much appreciated.
You’re right, that is a good way to go especially for a long sequence, and it would make a lot of sense here where I was going for a fixed structure like a 12-bar blues. It might be a little confusing for more flexible arranging though.
Another tool in the toolbox. Thanks for pointing that out.")
@midiSequencer I hope you don’t mind me peppering you with questions but you keep on giving...
If I have Quantum and Gadget loaded in AUM, what’s the best way to record clean loops? Can I arm AUM recording and trigger Quantum from within AUM using the transport buttons?
Thanks
Ok I think I have the clean loops thing figured out. Is there a way in Quantum to stop at the end of the sequence so you don’t mistime the ending?
Action = Stop (not sure if there is a bug with this in v1.1 - v1.2 out soon fixes a couple of things with start/stopping).
It all depends on context though - parts/sequences, sync/no sync, type f song mode (poly/all/link/solo/free/pick) etc - you could share your song.
See below a link to an under-the-hood data sheet on the great iElectribe (The link was long ago provided by a forum comrade, I want to say @Matt_Fletcher_2000 but it could also have been @Samu )
http://www.korguser.net/ielectribe/en/midi.html
I have no understanding of the Program Change stuff in the link, and am not sure how it relates to what Quantum does. If it does relate I'm interested...
My immediate interest is in using Quantum for cc noodling of iElectribe's synth 1, (or of the hats, or both)
Can one assign a Quantum sequence to synth 1's note aka 36 (C2) and use the faders to play with (that is, pattern lock stuff, then maybe randomize etc etc) cc 19 (synth 1 mod-type) 0-5?
The manual talks about external midi control (using cck say) but it can be controlled internally too using any app that can send those midi messages. Quantum (and MidiSequencer) both have extensive midi - including NRPN, RPN, Sysex, Midi Clock, Aftertouch, Pitchbend etc.
E.g. Program Change:
In CC Controller panel, enable 1, select PChg. The two rotaries should be left 0 if you don't want a bank change (midi CC0 & midi CC 32) to be sent with the Pchg ($CA - A here because iElectribe, like most drums want midi channel 10). The first rotary is MSB, 2nd is LSB - so 14 bits with top 7 bits in MSB, lower 7 in LSB.
Then in Setup, enable it on a sequence & pick CC1-Pchg - you can then draw the PChg you want with the faders. 0 is not sent (so 1..127 only) .
note : just seen a bug in the coreMidi code sending first rotary in CC32 - should be 2nd rotary - will be in next update. AB3 is fine though, so try that first.
Hope this helps?
Oh I definitely am a fan. Sadly haven't had much time lately to really dive in yet. Hopefully will be able to do so during the upcoming week.
It helps a ton thanks!
new video session folks - I'm only just starting to use this app properly after developing it for a year, but hope to show you the performance side..
https://forum.audiob.us/discussion/22055/quantum-new-video-session-available-mixing-parts#latest
Yep. Just tap the CC step button and select and enable CC19 in the first slot. Then hit the CC step button again and select CC19 from the list. Now the sliders control that. You can add other Electribe CC destinations in the same way. Then tap the CC button and select the one you want to manipulate. Plock your face right off.
Thanks big time, just tried this with CC 12 (FX Type), and am just mopping face off floor now - the old thing flipped jelly-side-down what a fking mess.
Insane what you can set into motion with this wonder and just a couple top toys like iElectribe and Mersenne
V1.2 just submitted to Apple
@midiSequencer I feel like a complete midi n00b right now. How do I map the faders in quantum to work with external controllers ? I have been trying and failing with pretty much every single controller I own. Launchcontrol Xl, Remote zero sl, midifighter twister,.... the list goes on. The midi learn seems to work but the faders refuse to work when I move the controllers. Could you perhaps walk me step by step how to actually enable the faders via external controllers ?
EDIT:- never mind. Found it. Hadn't enabled them in devices. Nothing to see here people. Carry on!
@gonekrazy3000 I've done the very same a couple of times.
This app is ridiculously deep. I’ve finally gotten past the having fun/learning stages, and it was worth the effort. This is ‘essential’ app territory.
i am so glad i own a iconnectaudio4+. turns out IOS for some retarded reason cannot handle 2 identical midi controllers even if they send completely different midi notes and cc. so was originally sad that i couldn't use my 2 midifighter twisters with quantum. but after some reprogramming so that both the controllers sent completely different midi cc and notes connecting to my ica4+ its working like a dream with quantum. 4 pages of 32 knobs and toggles to play with. cant wait to get it all mapped and working
It is beyond deep. Deeper than deep. So much so that I think it needs a series of tutorials that break it into manageable pieces. I love the manual and I appreciate the dev's aspirations for videos, but I would love a "do this, then do that" hands-on approach.
hey @midiSequencer i have a question. if i'm understanding correctly the app is capable of sending midi notes back to controllers right ? would it be possible to actually send midi to light up leds so that we get visual feedback on an external controller ? if possible i would very much like to make my midifighter twisters light up with the currently playing sequence... for that i'd need the ability to output a very specific note and velocity per step of the sequence. something completely seperate from the currently playing notes being outputted by the sequencer. considering how deep quantum seems to be i'm wondering if the ability to do this is already in there somewhere.
The manual is working towards that approach with its sessions - I'm back working on that tomorrow (I do have a day job too would you believe!). At least with something written down it can be digested slowly - all of my vids are more showcase at the moment.
A couple of areas I need to cover are midi input & actions - so those are planned next in the manual.
after reading the manual - I can't see it responding to midi in - thats just for firmware updates? Is that right?
Personally, I prefer written versions of these kind of mini step-by-steps, particularly because you can see all steps at once so that if something's not working at some point, you can easily back trace instead of scrubbing a video player.
@lukesleepwalker Are there particular things you're aiming to do? I reckon part of the issue is that it's so deep, you can use it for so many different things (sometimes any one of those things in different ways). I don't think there's a particular 'end goal' one could articulate that a series of mini tutorials would be able to build towards (as opposed to, say, learning a programming language).
MIDI Input and Actions seem like good next steps for sure. I like the sessions approach. Wondering, after the basic descriptions of controls is complete, if a slightly more 'Cookbook' approach might make the most sense for a super open ended app like Quantum. The beginning is the basics of food and ingredients. Then it's off to recipes for particular things (with links back to the basics as needed). That approach, similar to sessions, can be as open ended as the app itself is. And might make it easier for others to contribute 'recipes'.
Actions in particular, seems a great area for this approach. A section describing how actions work, a section detailing each action and the a series of recipes like the below that simply list the actions required in which order.
• Cookbook style, "A variation": How to make version 1 loop five times and version 2 loop three times
actually all midifighters respond to midi notes that are identical to the ones assigned to a specific button and also its velocity over channel 4. you can see it in action in this video:-
obviously the functionality isn't identical to what i'm thinking of doing. i'm actually trying to mimic the led feedback from the Zaquencer. the video will give you an idea of what it can do though.
basically all i need is to be able to assign a midi note and velocity per step just for led feedback.
its similar to how the launchpads behave in their user mode as well.
you can see it reacting to feedback in this brief teaser:-
another video to see how it works in ableton:-
EDIT:- wow. apparently it has an actual sequencer hidden in its firmware. i think my mind just exploded D=
edit2:- found a video of an ios dev using it in his software:-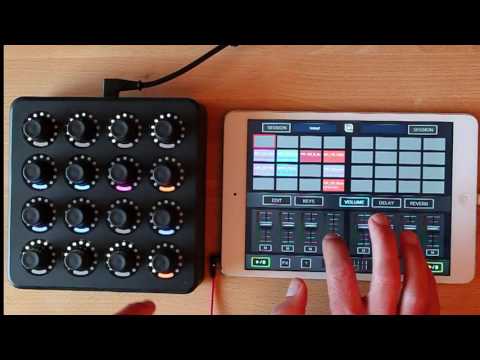
Ok - so I'm just now passing the Casual-User-Look-Pretty-Lights! stage and digging in a bit deeper. I'm trying to explore more of the automation but for the life of me I can't figure out how to have Seq 1 play and then trigger Seq 2 upon completion. I'd even be up to setting Seq 2 to trigger Seq 1 again when done.
C'mon you MIDI geniuses out there - I know I'm missing something obvious. Help!
I had this working the other day, you need to get familiar with actions. They are like follow actions in ableton live.
managed to find a copy of the manual here:- https://d1aeri3ty3izns.cloudfront.net/media/19/196749/download_196749.pdf
it definitely responds to midi as shown in this excerpt:-
"The large RGB segment at the 6 o’clock position of each encoder display is used to indicate the state of
the switch control, using the Midi Fighter Utility it is possible to set the color for both the inactive (not
pressed) and the active (pressed) switch state.
It is also possible to overide the color of the RGB segment by sending a MIDI message (Note or CC) of
the same MIDI number, on channel 1. Sending a message of value 0 will force it to its inactive color state,
while sending a message of value 127 will force it to is active color state. Any value between 0 and 127 will
set it to a color as shown in the scale below"
what i'm planning on doing is making the large led change color to indicate the current playhead position.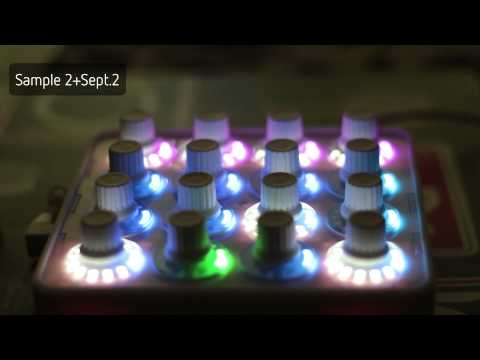
so pretty:-
Quantum as hardware.